Posts Tagged With: travel photography

The Himalayas to the Thar desert – NEPAL & INDIA

The name Chomolungma, or Sagamartha depending on which side of the Himalayas you are coming from; has resonated strongly with avid travelers like myself for years. Many yearn to climb her but only a few lucky ones will ever succeed. While many are simply content to stand in her shadows and see with their own eyes. Maybe one day I will attempt to summit the peak, but for now I was just happy to be in the same country as Mount Everest!

The main objective of my first ever visit to Nepal was to get a taste of what to expect for future hiking trips in the region. Due to our limited time in the country I opted for the Annapurna range via Pokhara upon hearing of its serene beauty – of both the town and the surrounding hills and mountains. With the first few days in Kathmandu for sightseeing and trying out different variations of the local delicacy ‘momo’ (fried dumplings) – we took the well worn 6 hour car ride to Pokhara.

Looking back, there is nothing I can write that hadn’t been covered before about Pokhara or the Annapurna. All I can stress the importance of is shoes! Looking back, everything else I planned for or equipped for was fine, except for the shoes. I have a nice pair of lightweight Columbia water proof trekking mid-neck shoes (not boots), and worn in enough from previous travels and activities etc. Making the ascent was fine, it was not until the descent that I realized the shoes fit a bit too snugly and my toes were hitting the end of the shoes with every step down. Times that by thousands and thousands of steps and suddenly you are in a lot of pain with no one to blame but yourself. Always buy hiking shoes/boots with room for your toes to slide or move a bit, you will be grateful for it. My fault:)

Then there was India.

This was a love it or hate it type of country. I loved it, but some of my friends didn’t. Our gruelling and tight schedule did not help either. For many years I had dreamt about visiting Jaisalmer and staying in the fort in the desert, and was adamant we had to get there somehow.

From Delhi to Agra to see the Taj Mahal, then to Jaipur, Jodhpur and finally Jaisalmer – everyday was roughly 6-7 hours in the car traveling to the next city. This was the most cost effective way with the short amount of time we had, as last minute trains and flights did not match to what we needed.

The colours, my gosh the colours of the Rajasthan region was breathtaking! You see it on television but to see it in person or through the camera lens was like looking through a kaleidoscope of vivid scenes. I love history and culture, and to see the famous forts in each city of Jaipur, Jodhpur and Jaisalmer – I tried to imagine myself walking through those narrow streets or battlements hundreds of years ago.

We wrapped up India in a relaxing, albeit slightly hot and painful manner. Camel riding in the Thar desert, and slept overnight on the sand dunes. A nice and surreal way to end what had been one of our most physically tiring trips so far, in terms of duration spent driving, flying and training it. Add in white water rafting, para-gliding and that unforgettable and arduous ‘little’ hike we did in the Annapurna. I hope to return as soon as possible!

Below are some images from both countries during the journey, enjoy:)


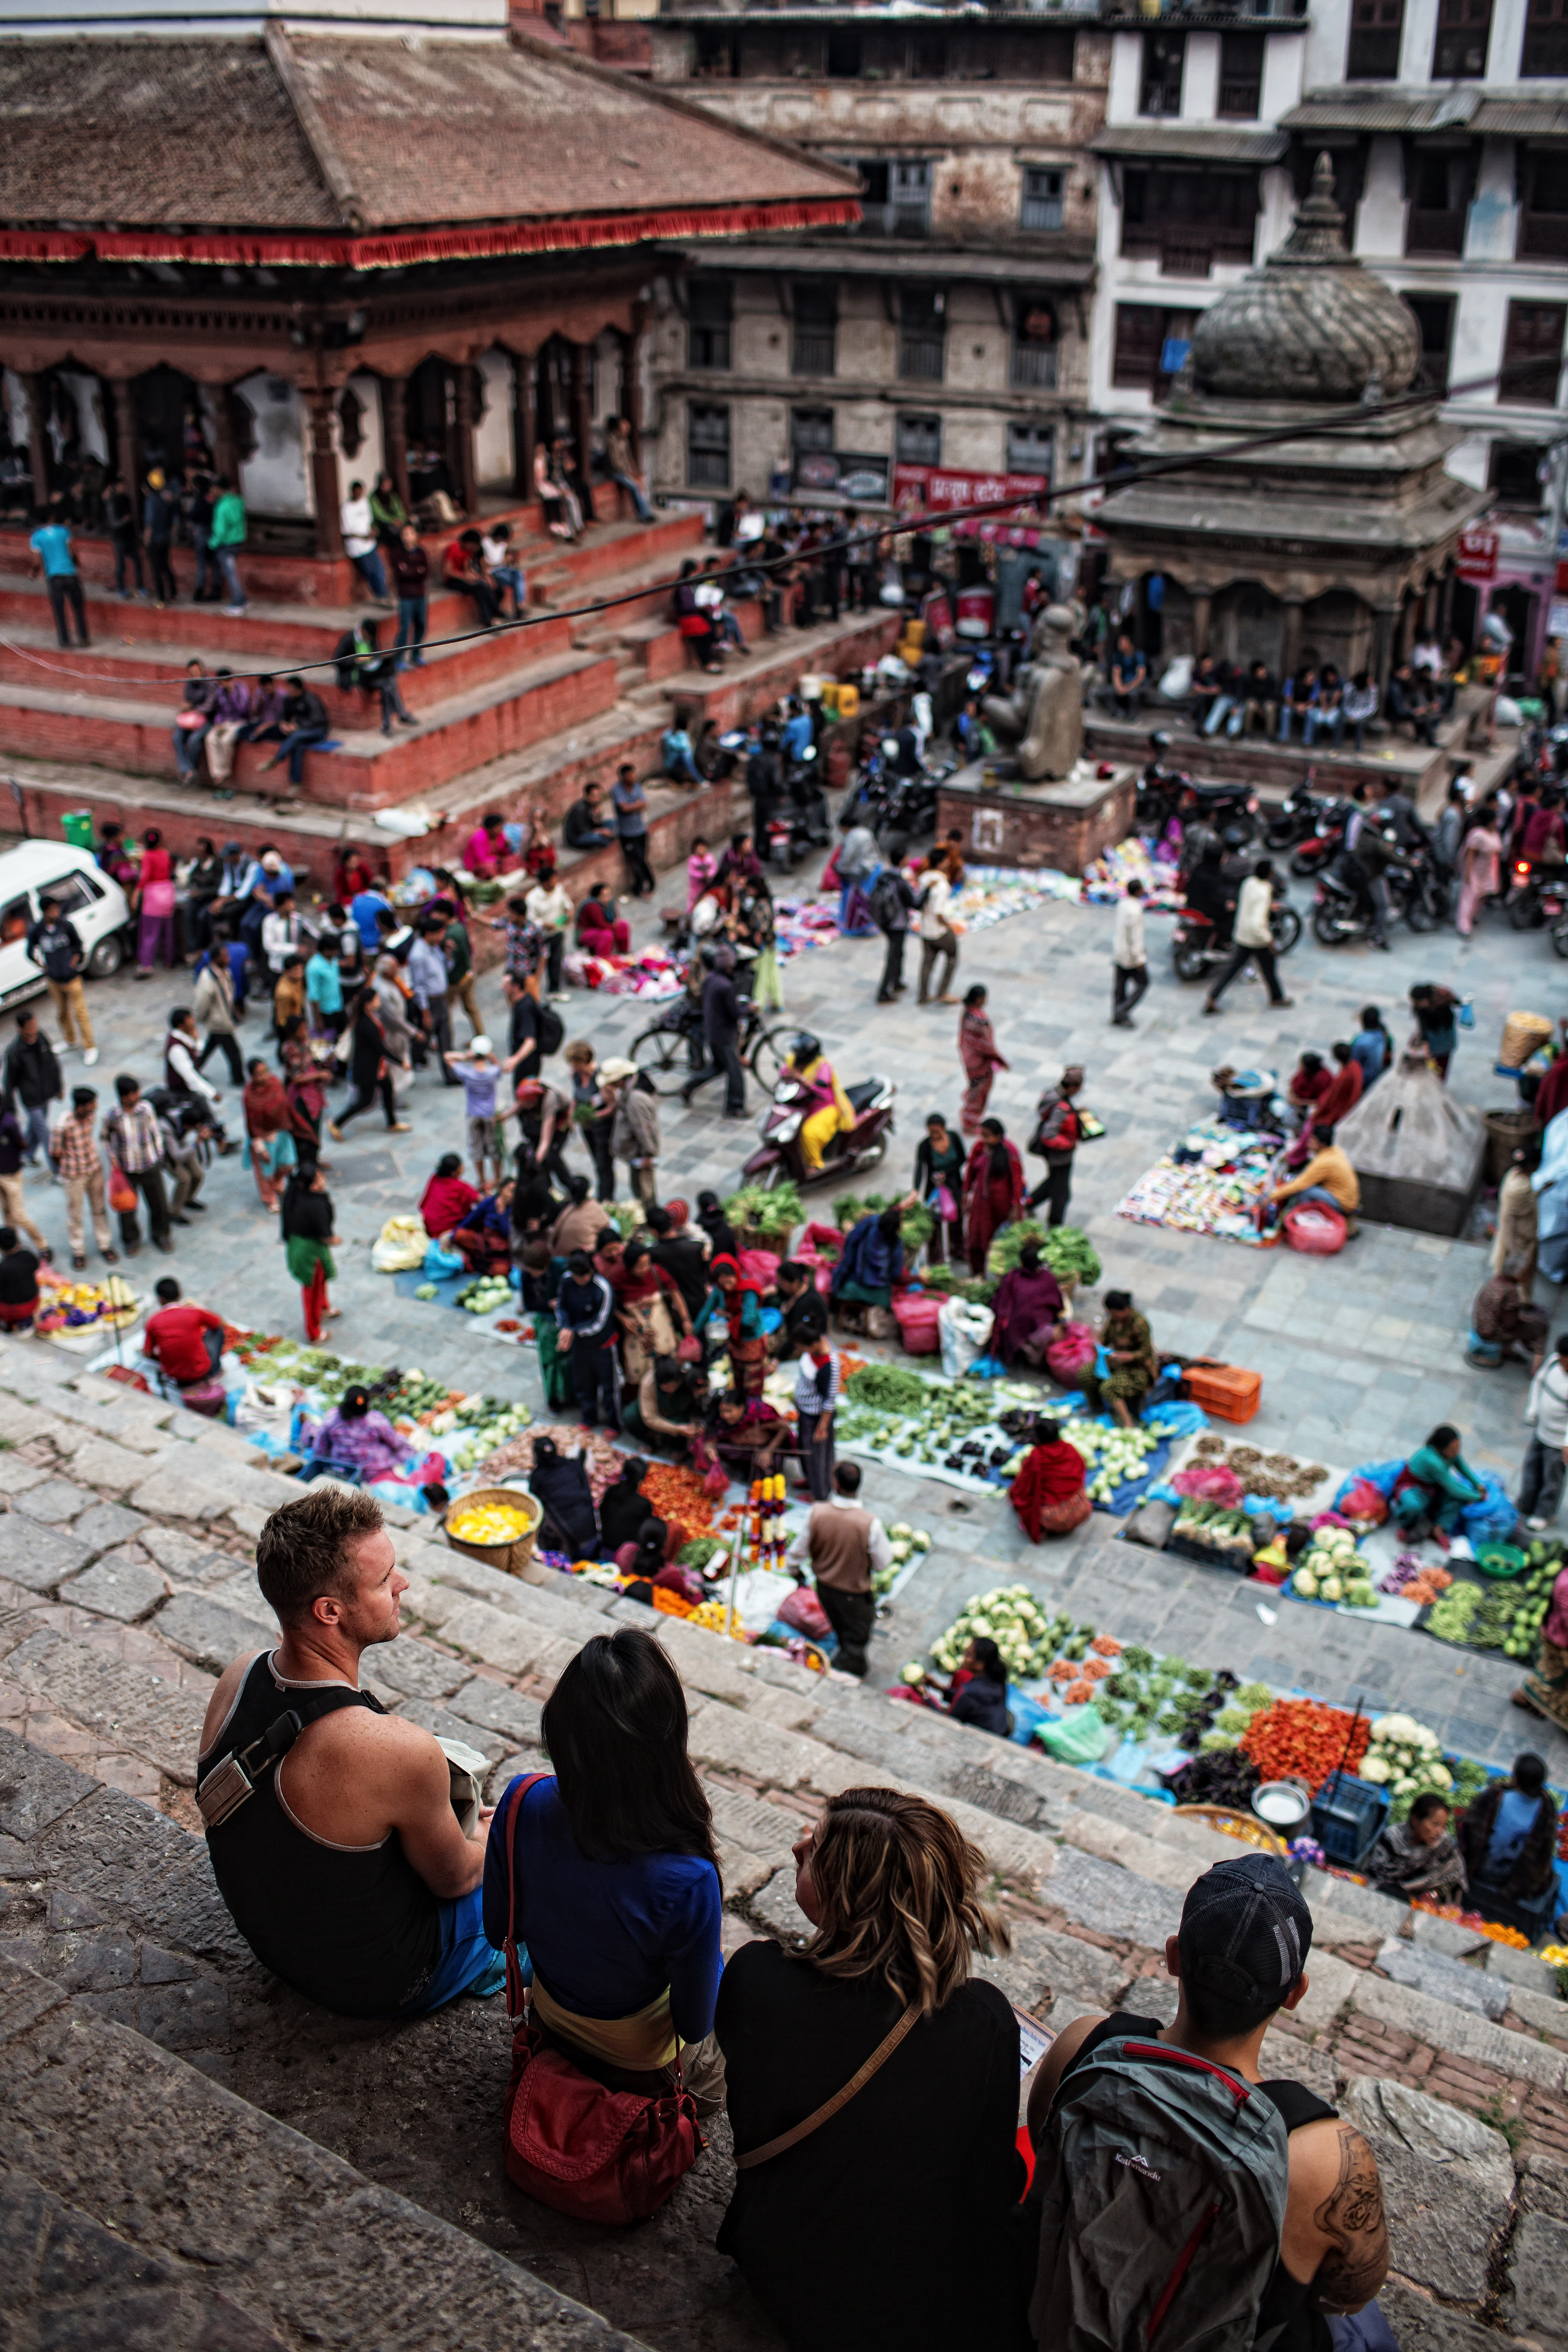
Our first day in Kathmandu, finding our way to Durbar Square and trying to get through the afternoon traffic.

NEPAL & INDIA trip -2861


Local sellers in Durbar Square in the late afternoon.

NEPAL & INDIA trip-2900


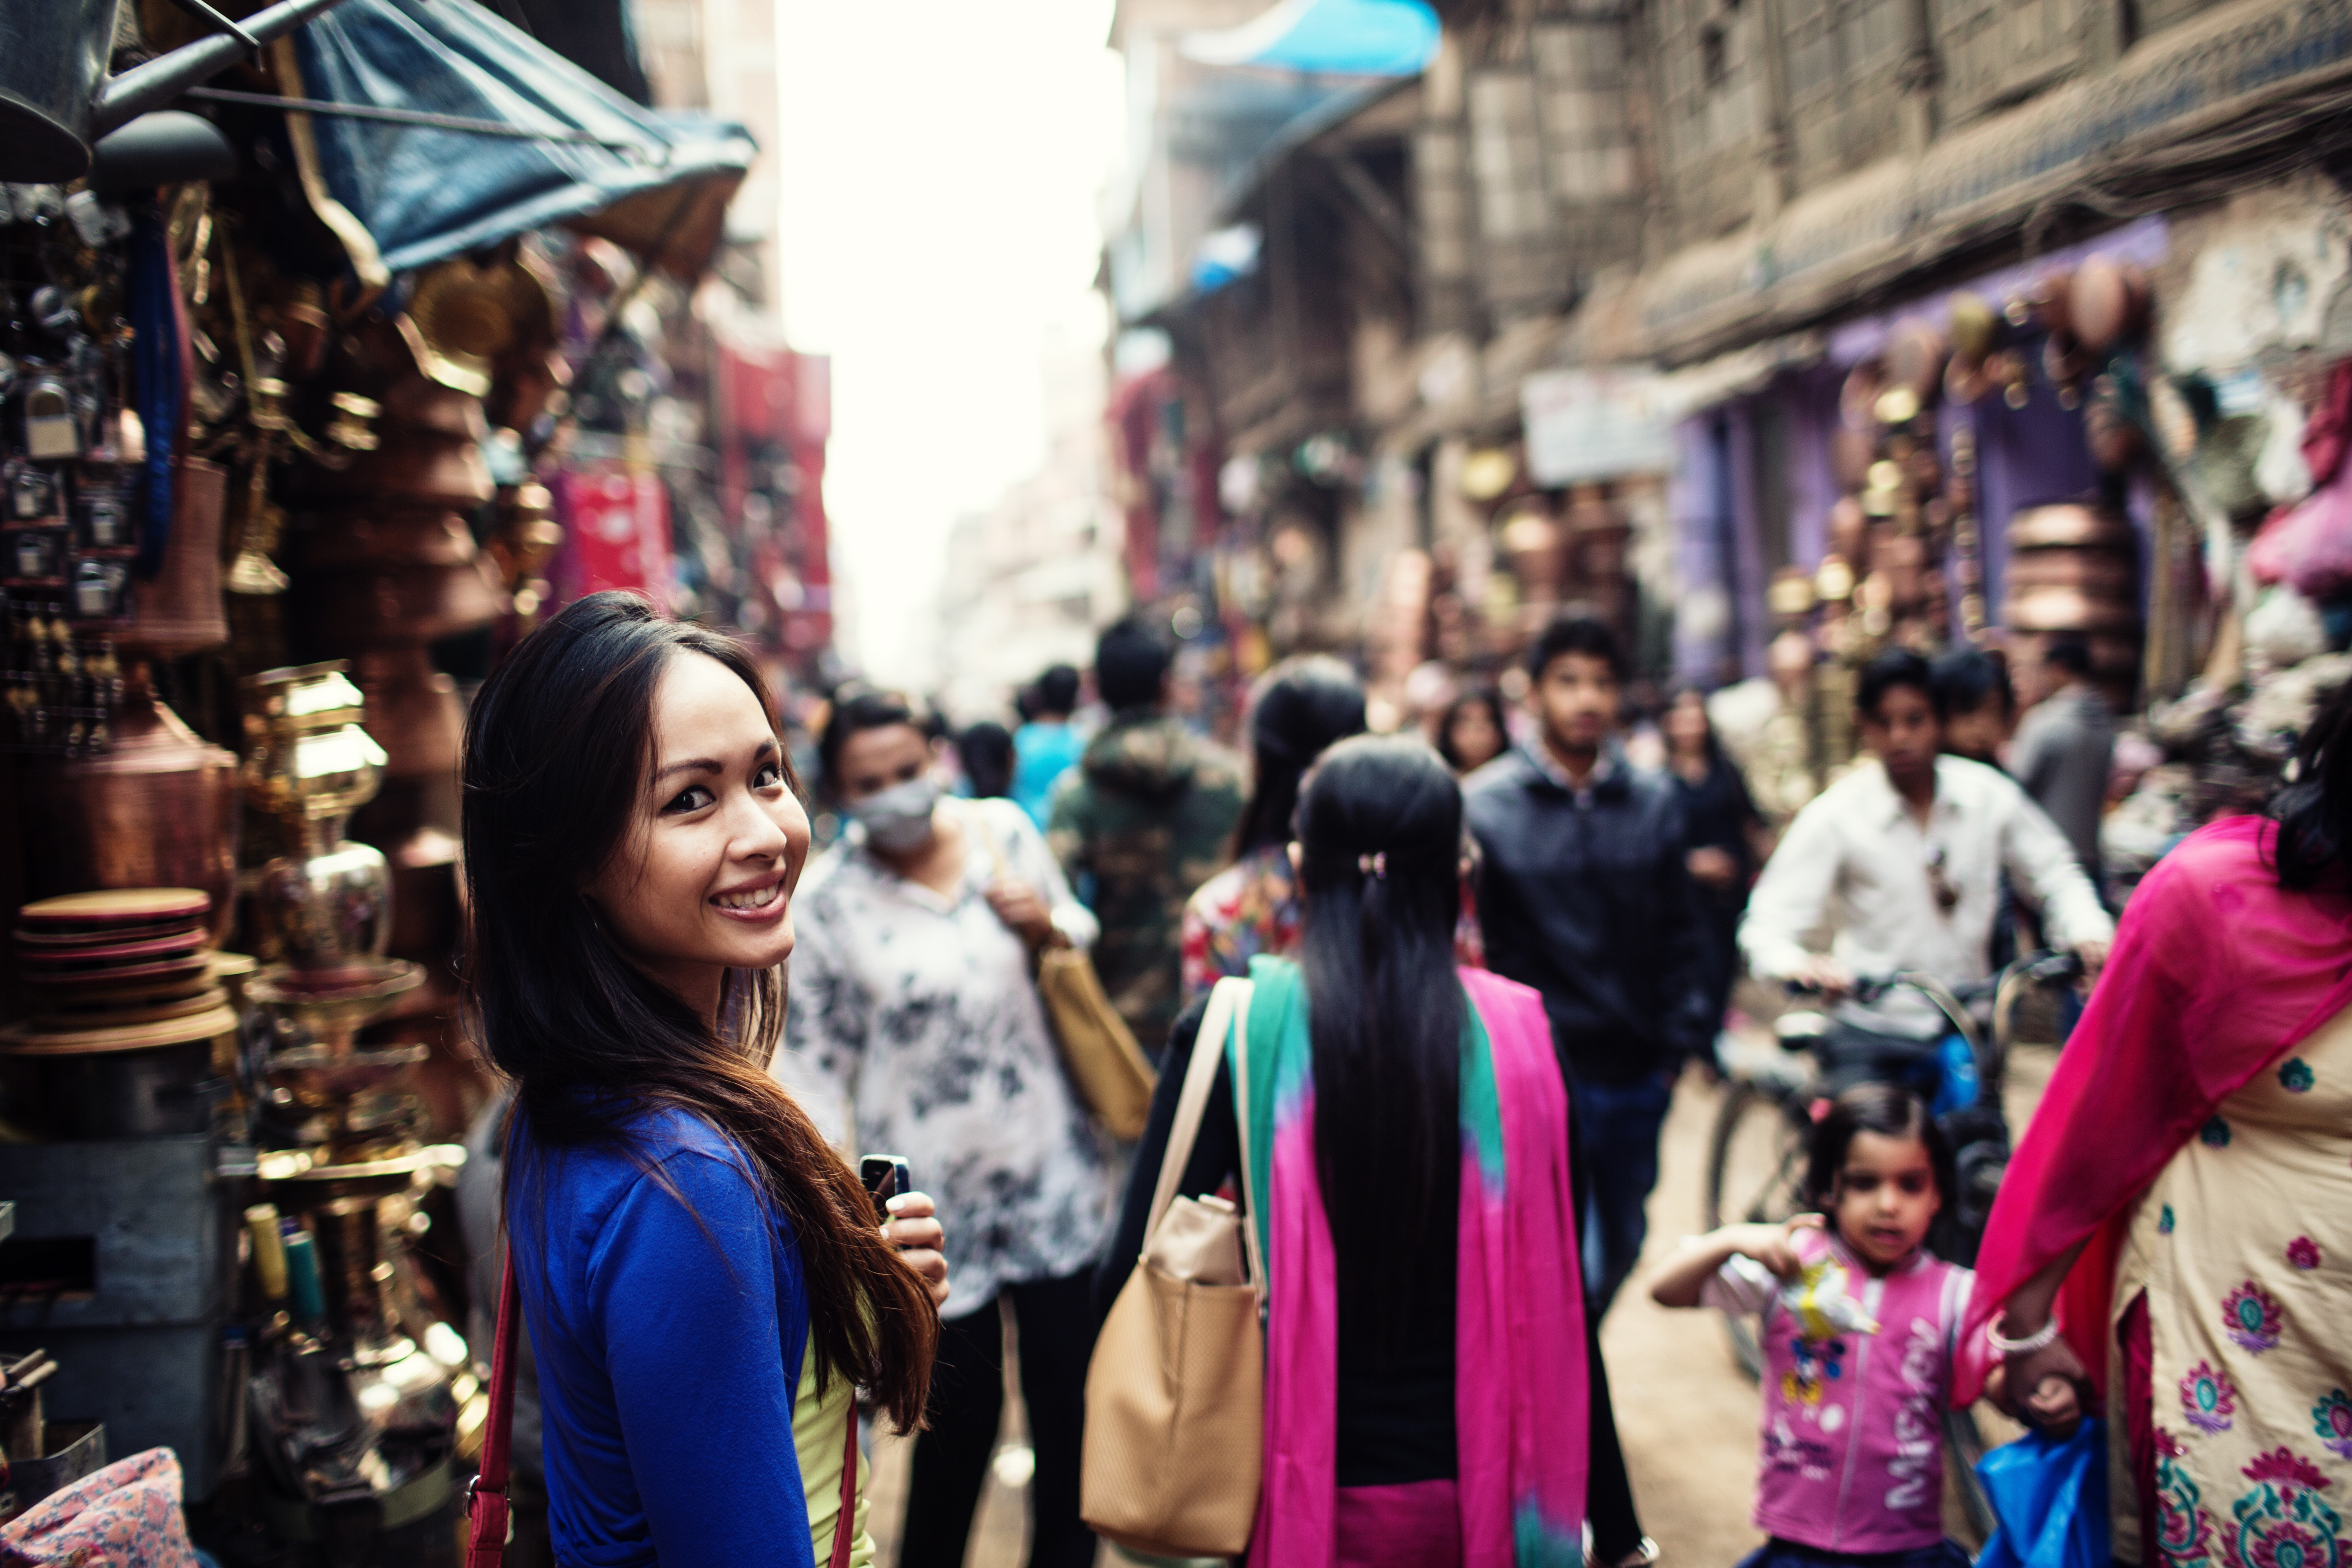
People watching in the local market – Durbar Square.

NEPAL-INDIA TRIP-2891


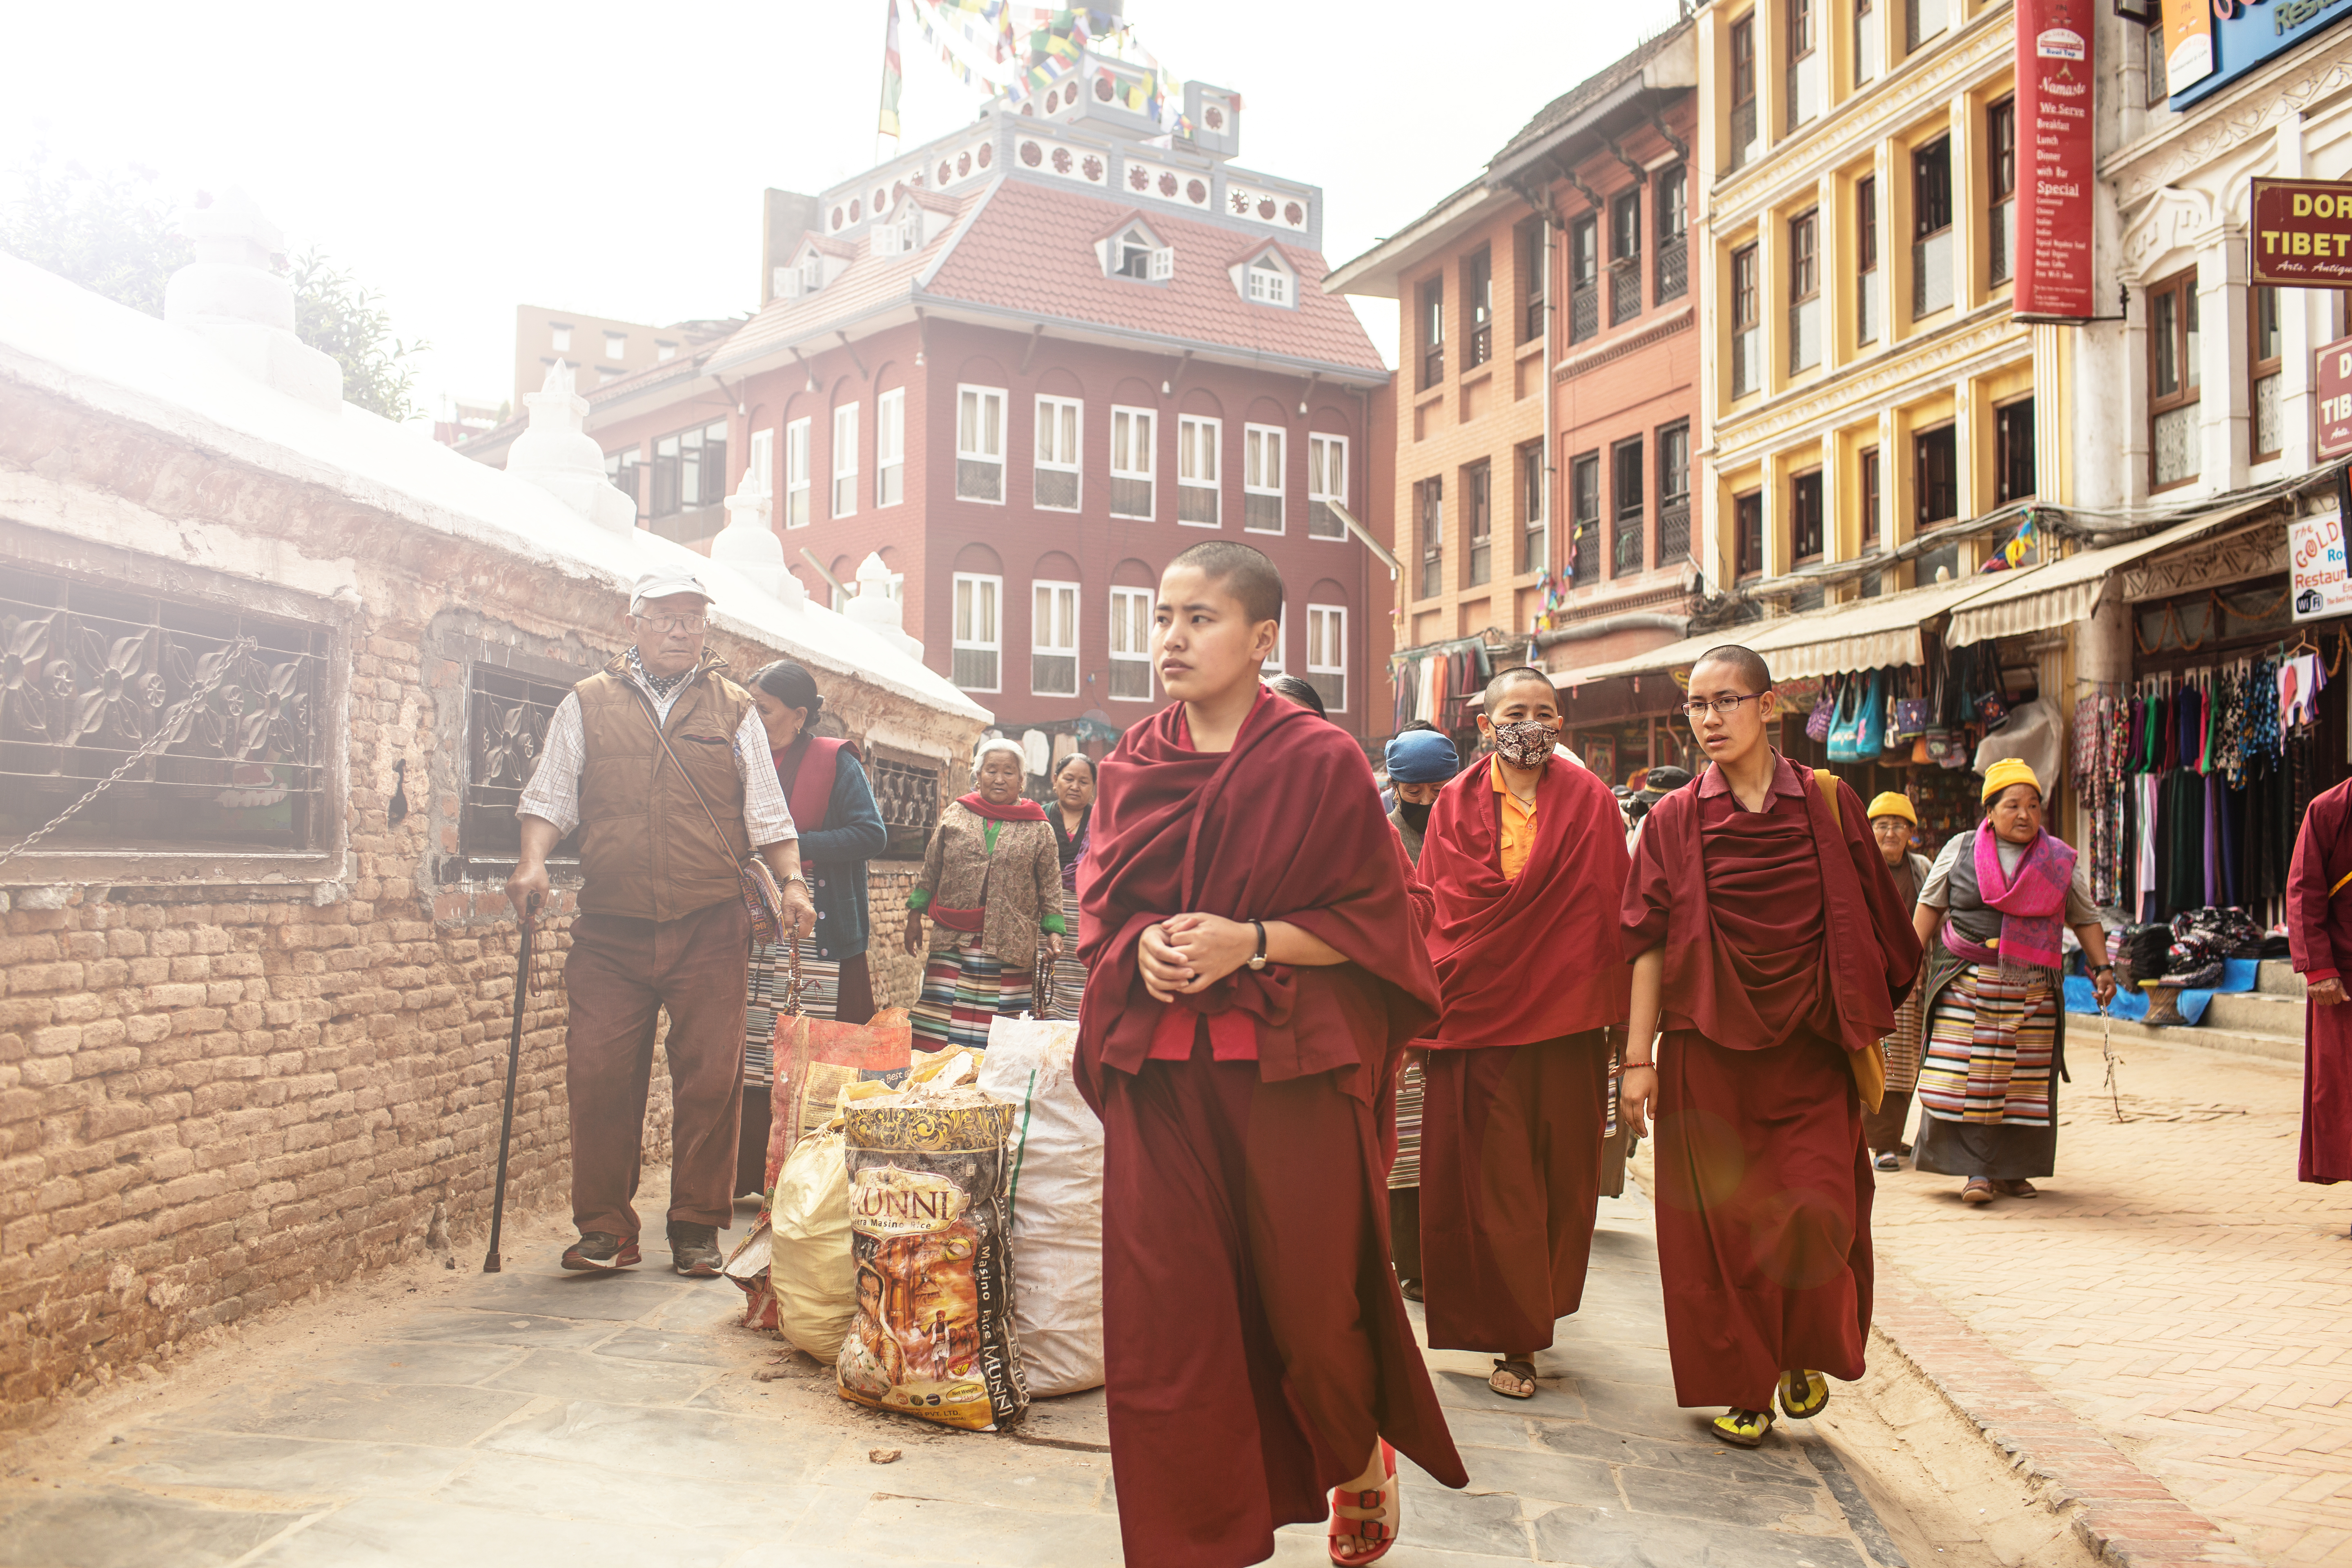
Young monks at the Boudha Stupa – Kathmandu.

NEPAL & INDIA TRIP-2928


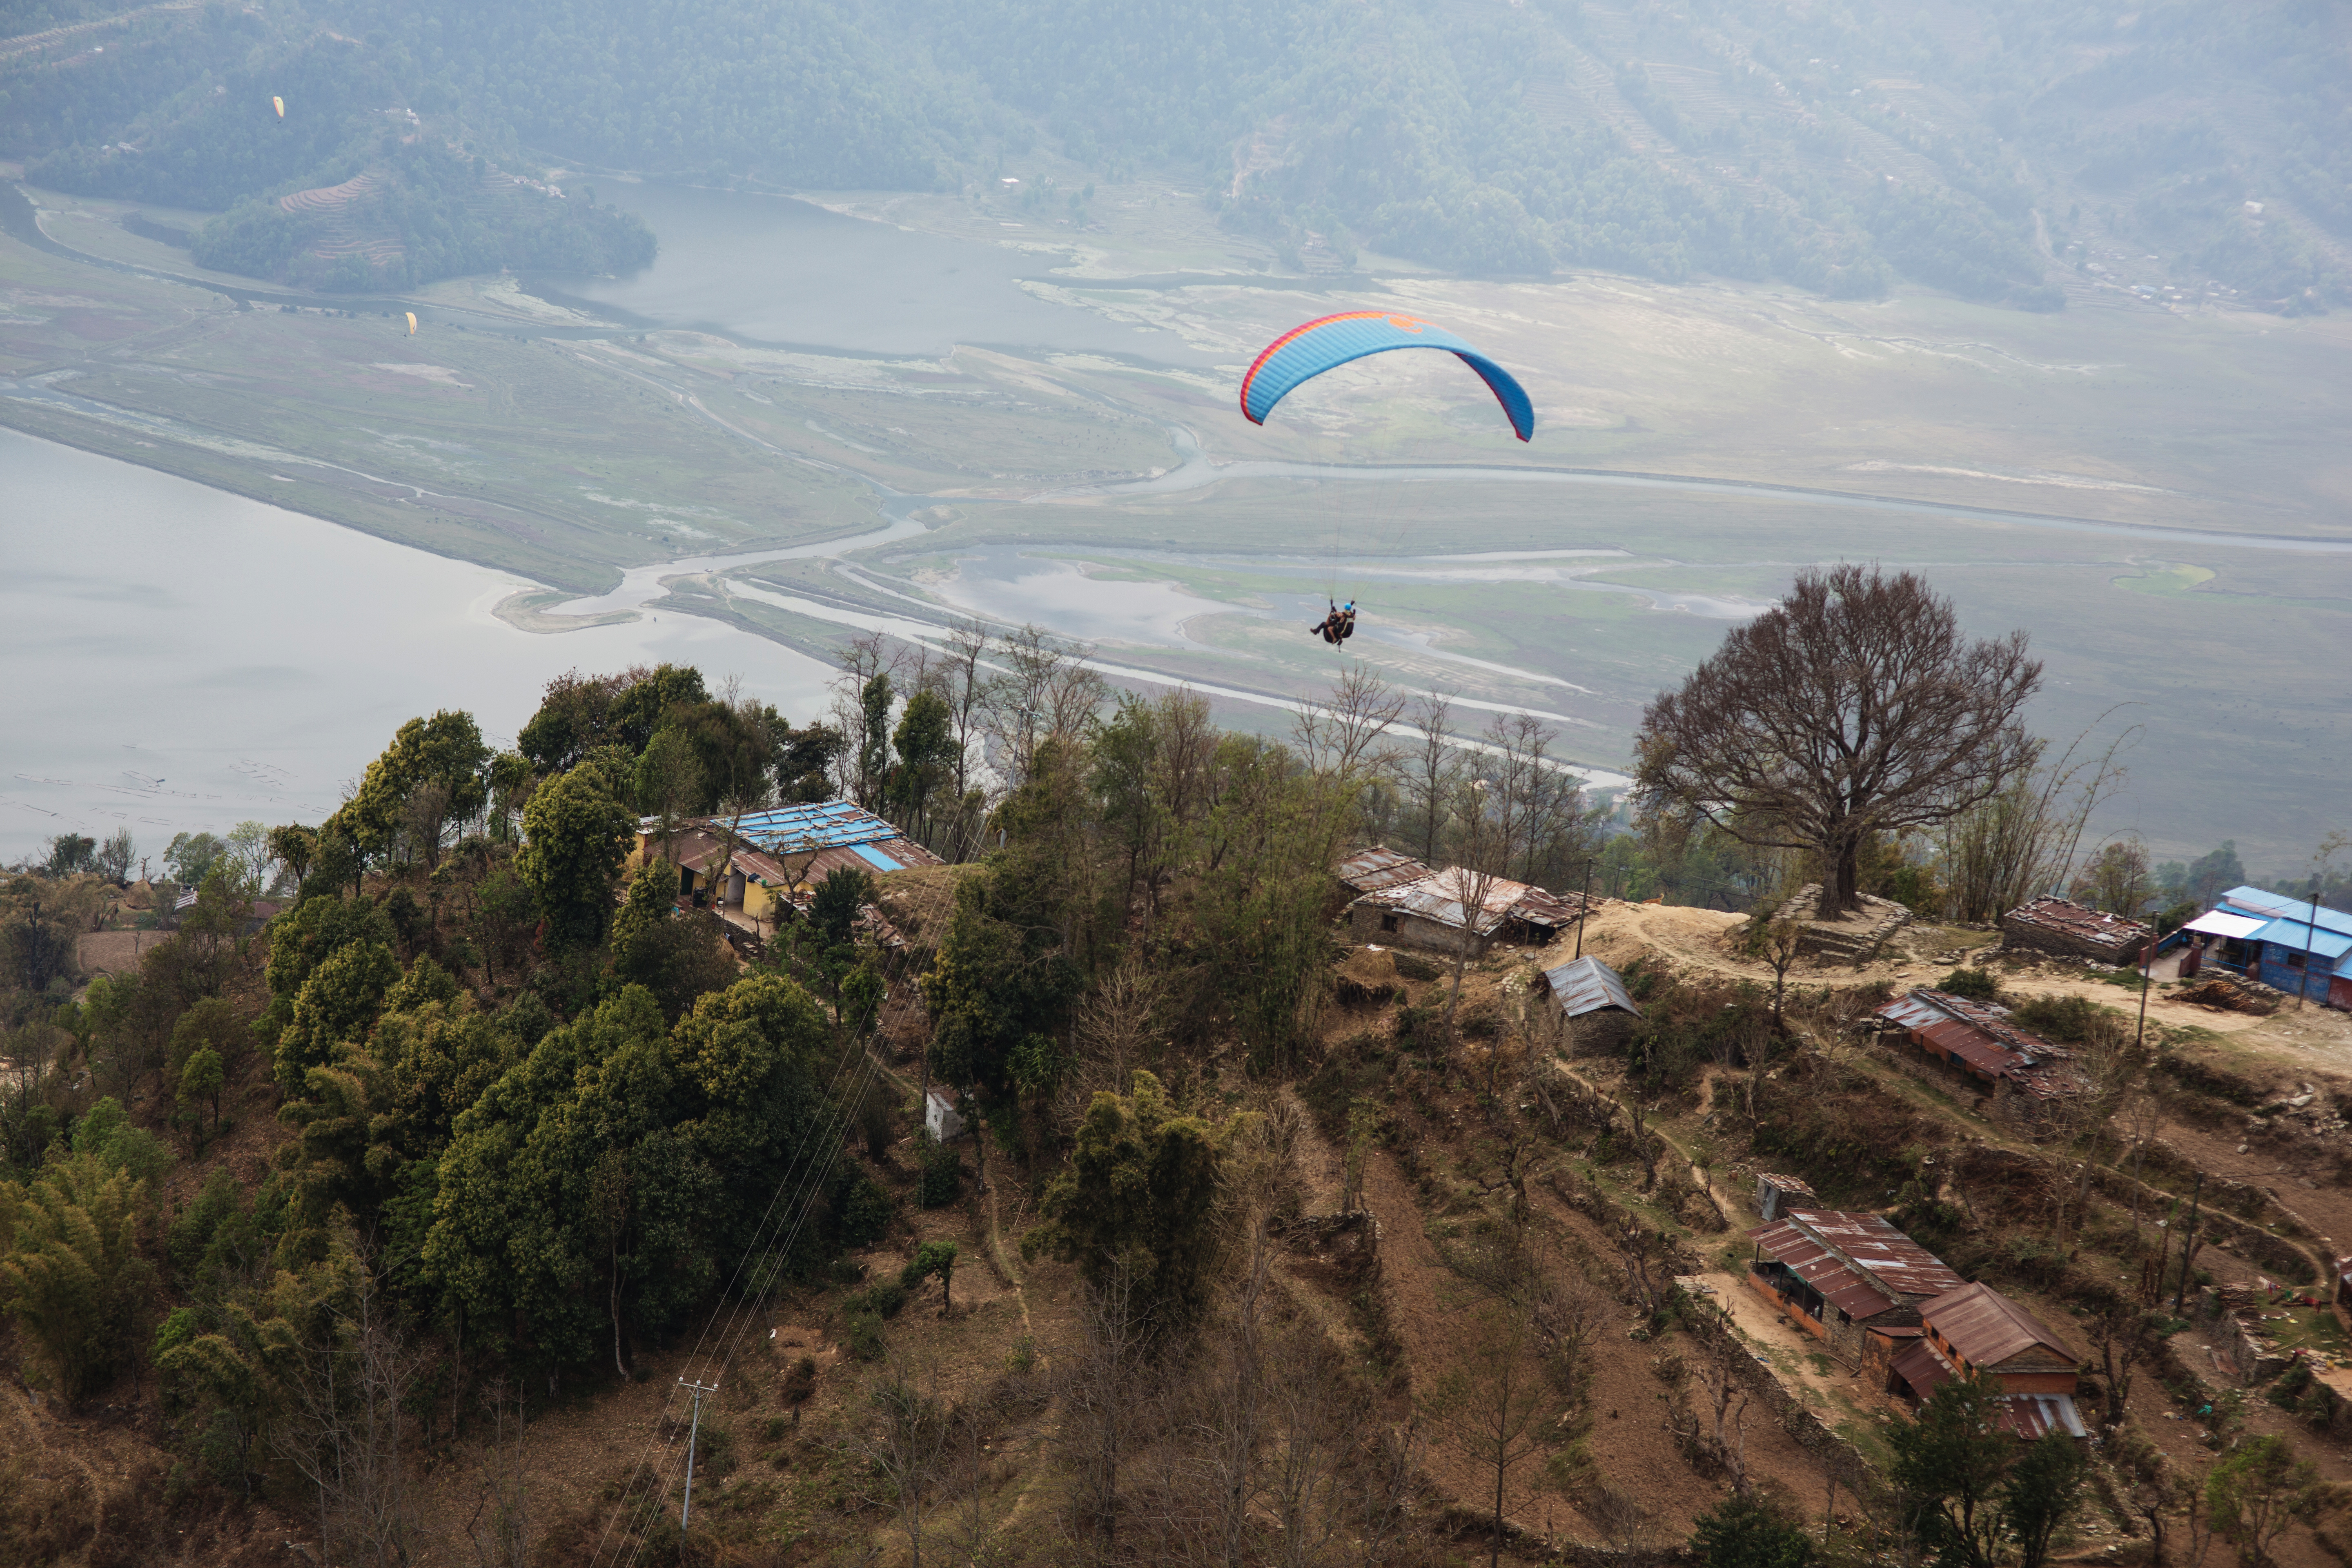
I shot this of a fellow para-glider in front of me whilst up in the air, with Pokhara and its serene lake in the background.

NEPAL & INDIA TRIP-3008


Another shot of a para-glider skimming over the ridgelines near Pokhara. It looked a lot more cooler in person:)
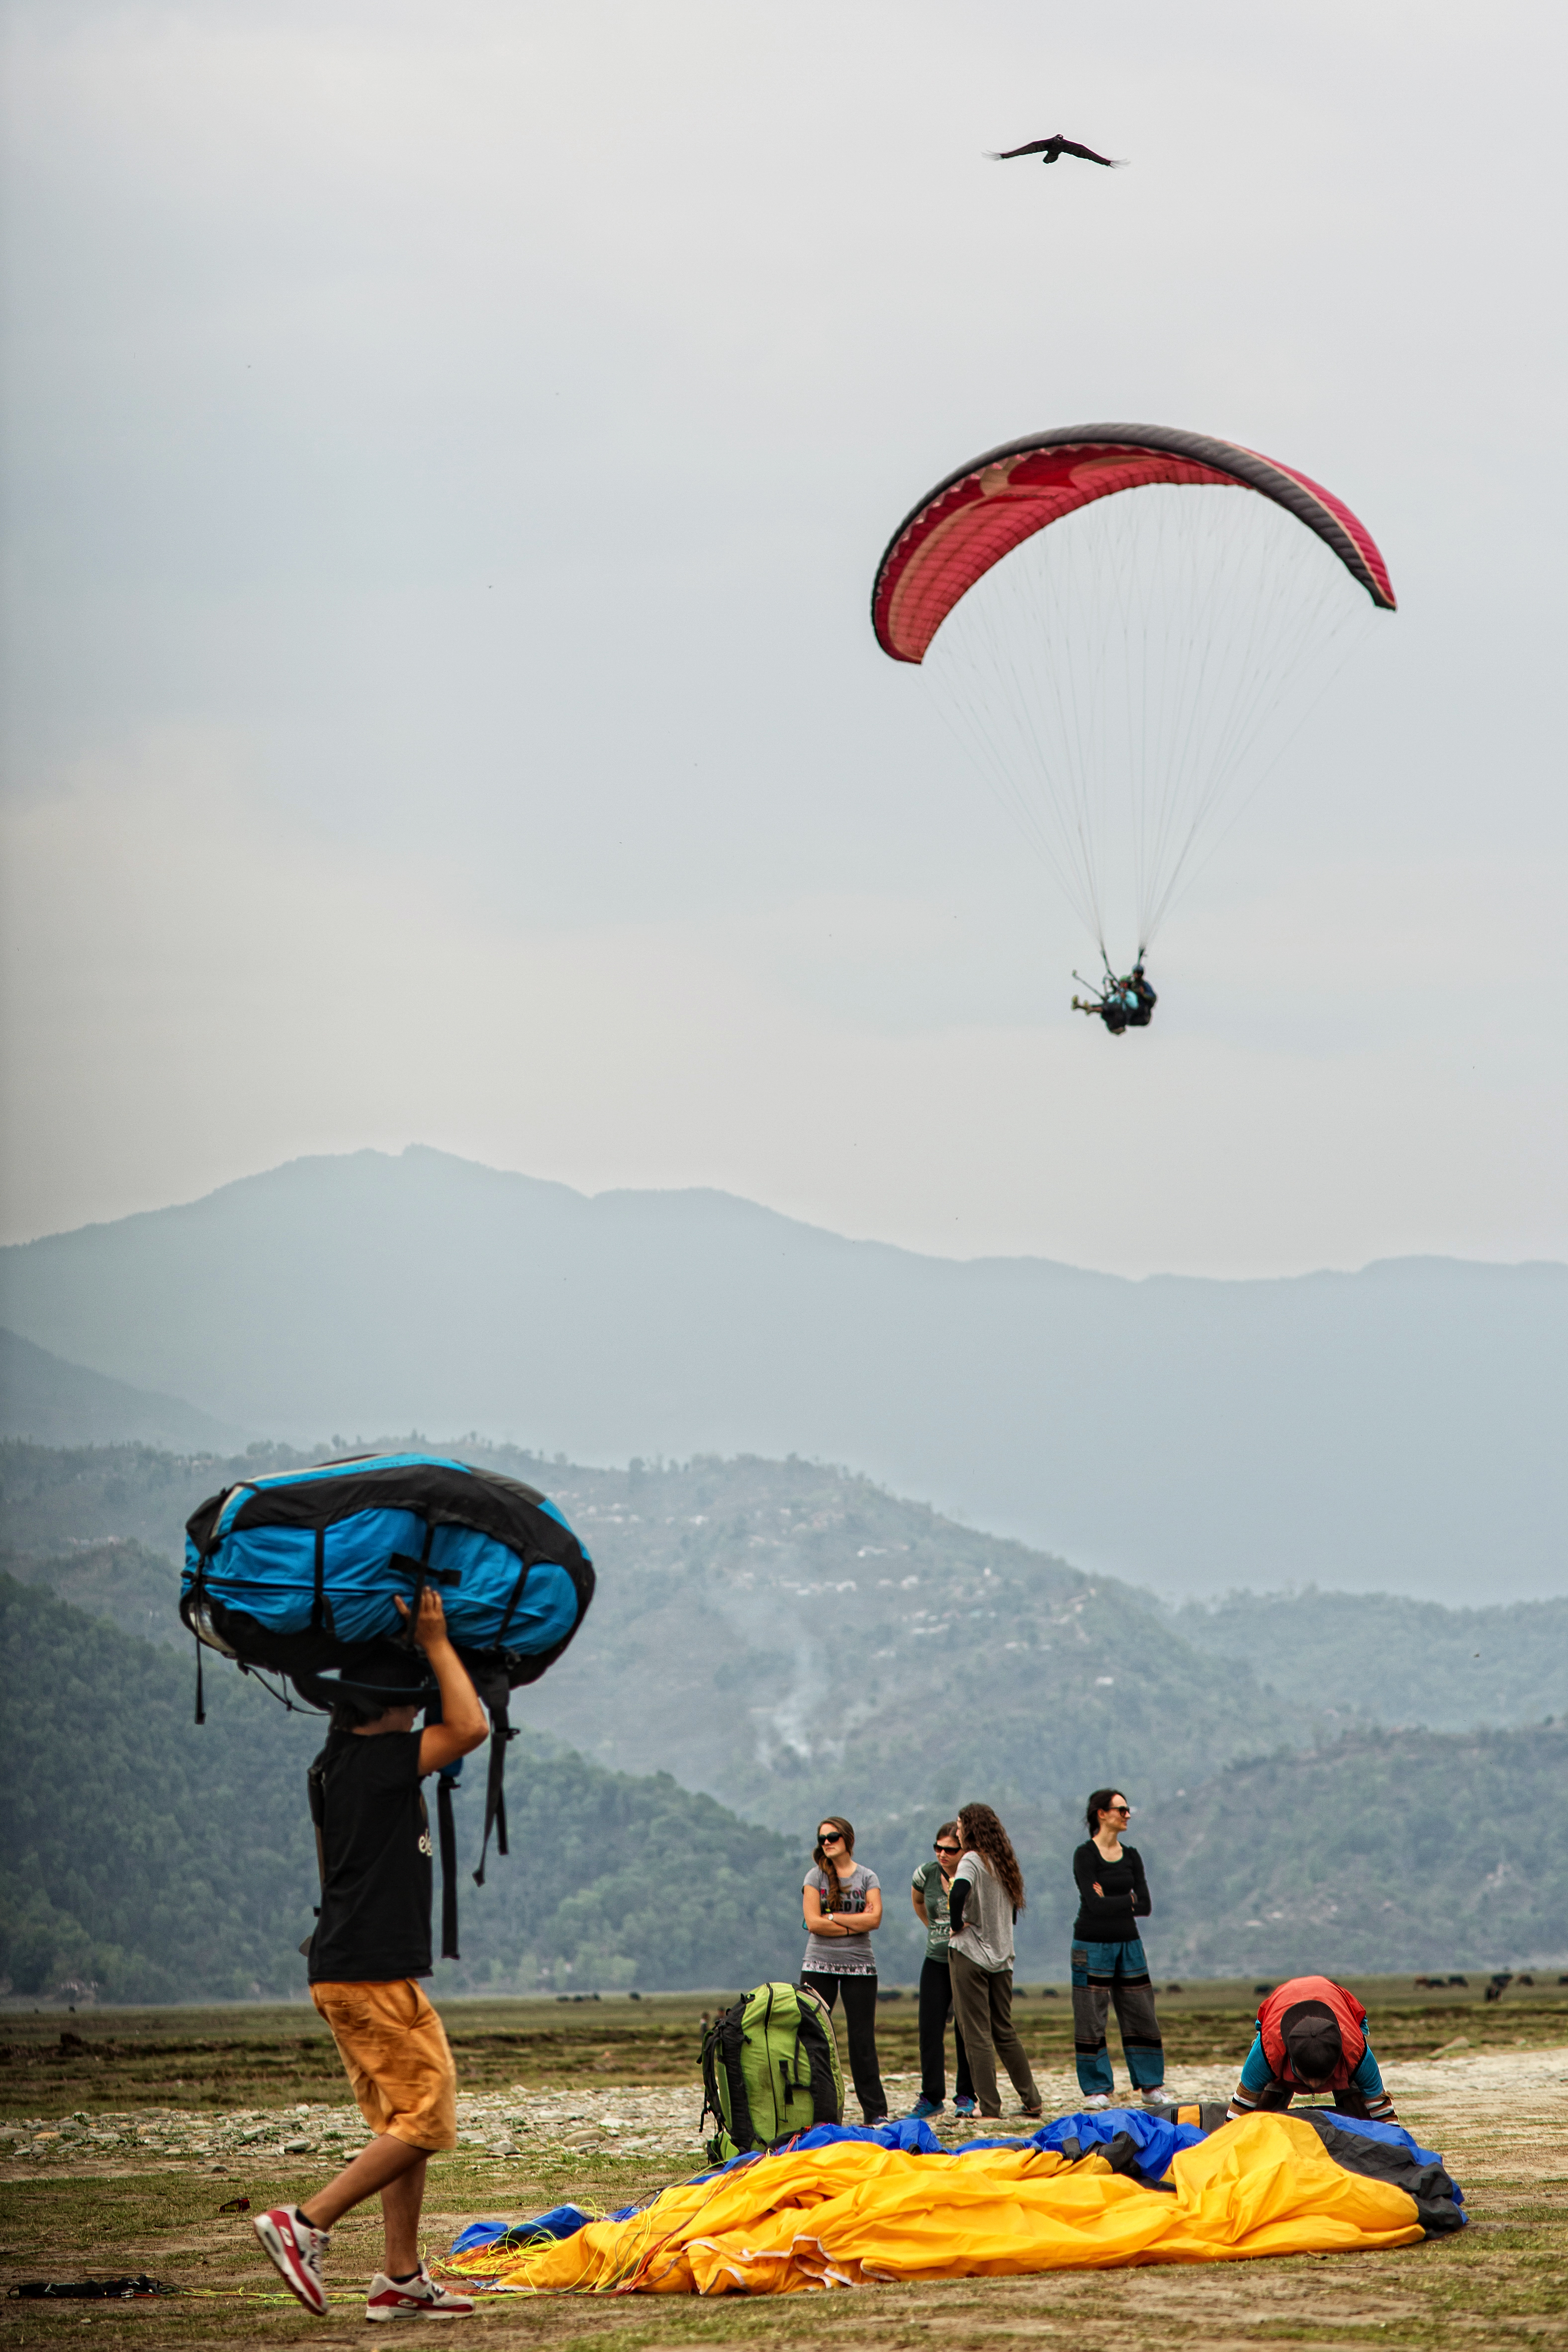
NEPAL & INDIA TRIP-3050


Landed!

NEPAL-INDIA TRIP-3071


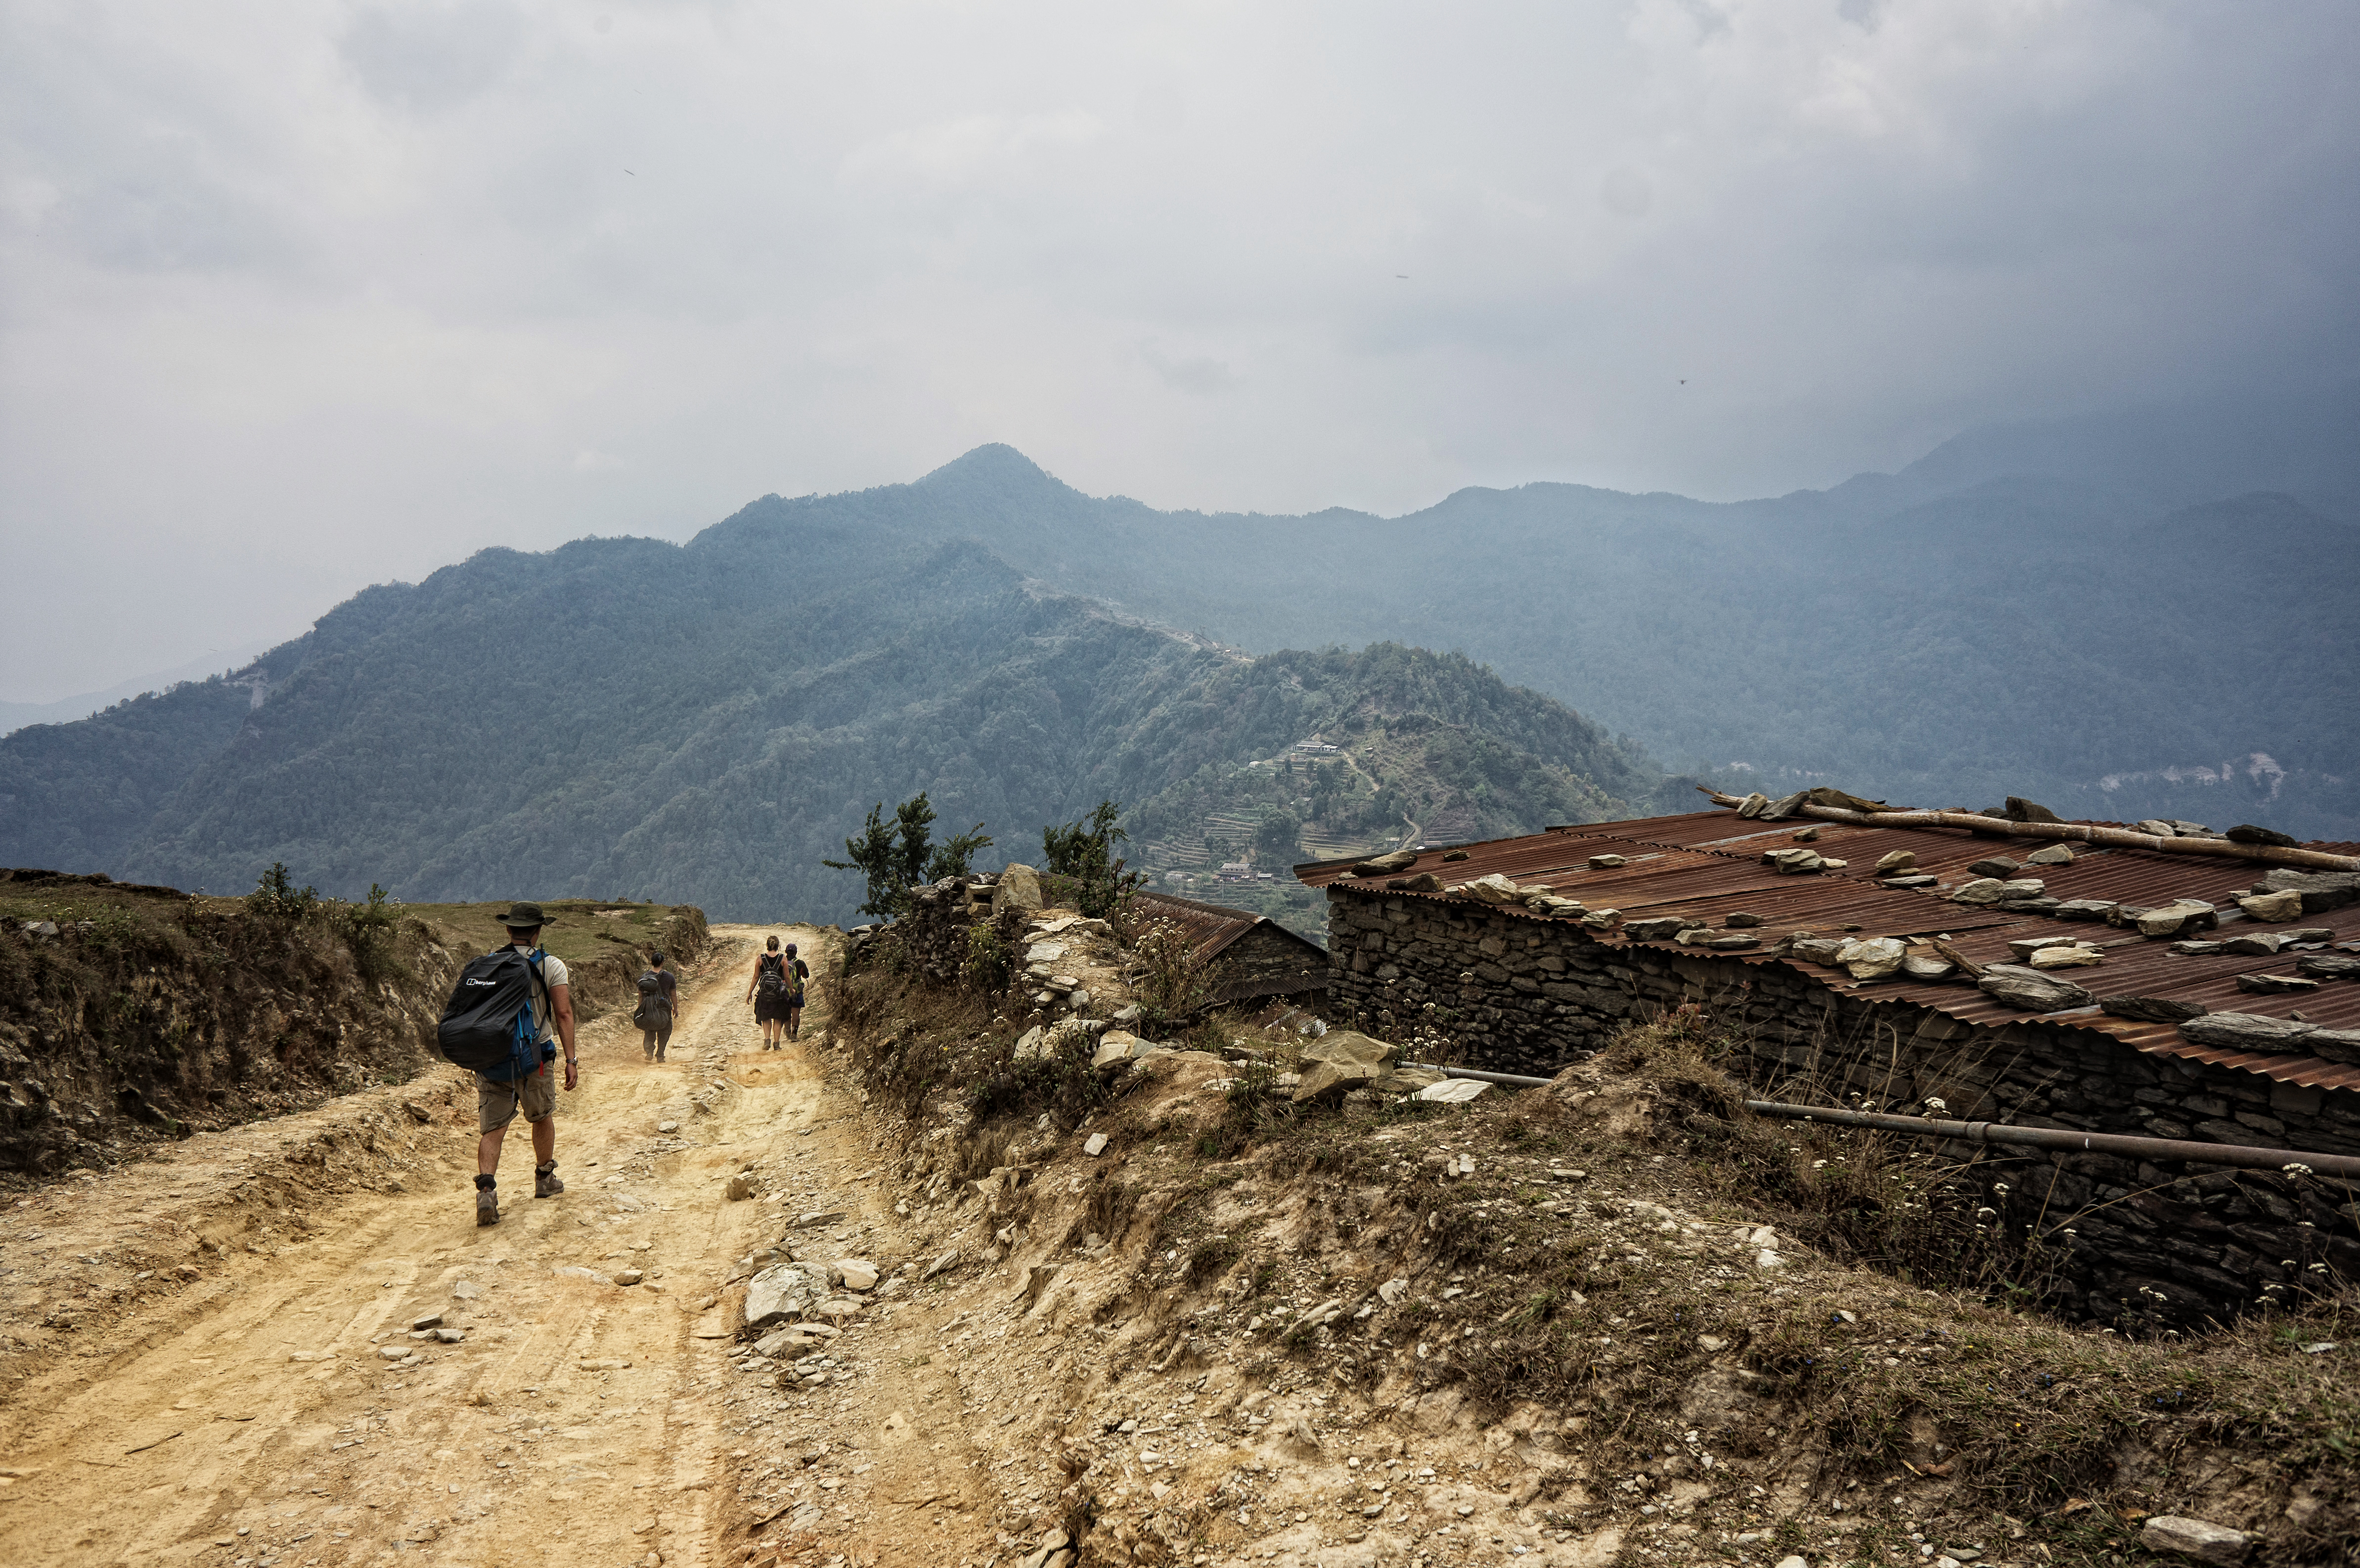
The long and amazing ascent/descent/ascent etc to Panchasse village for the night – Annapurna hills

NEPAL-INDIA TRIP-00101


One of the most unforgettable nights I ever had on my travels around the world. Sitting around the village campfire getting to know travelers from around the world and sharing food with the local women who looked after us.

NEPAL & INDIA TRIP-3186A


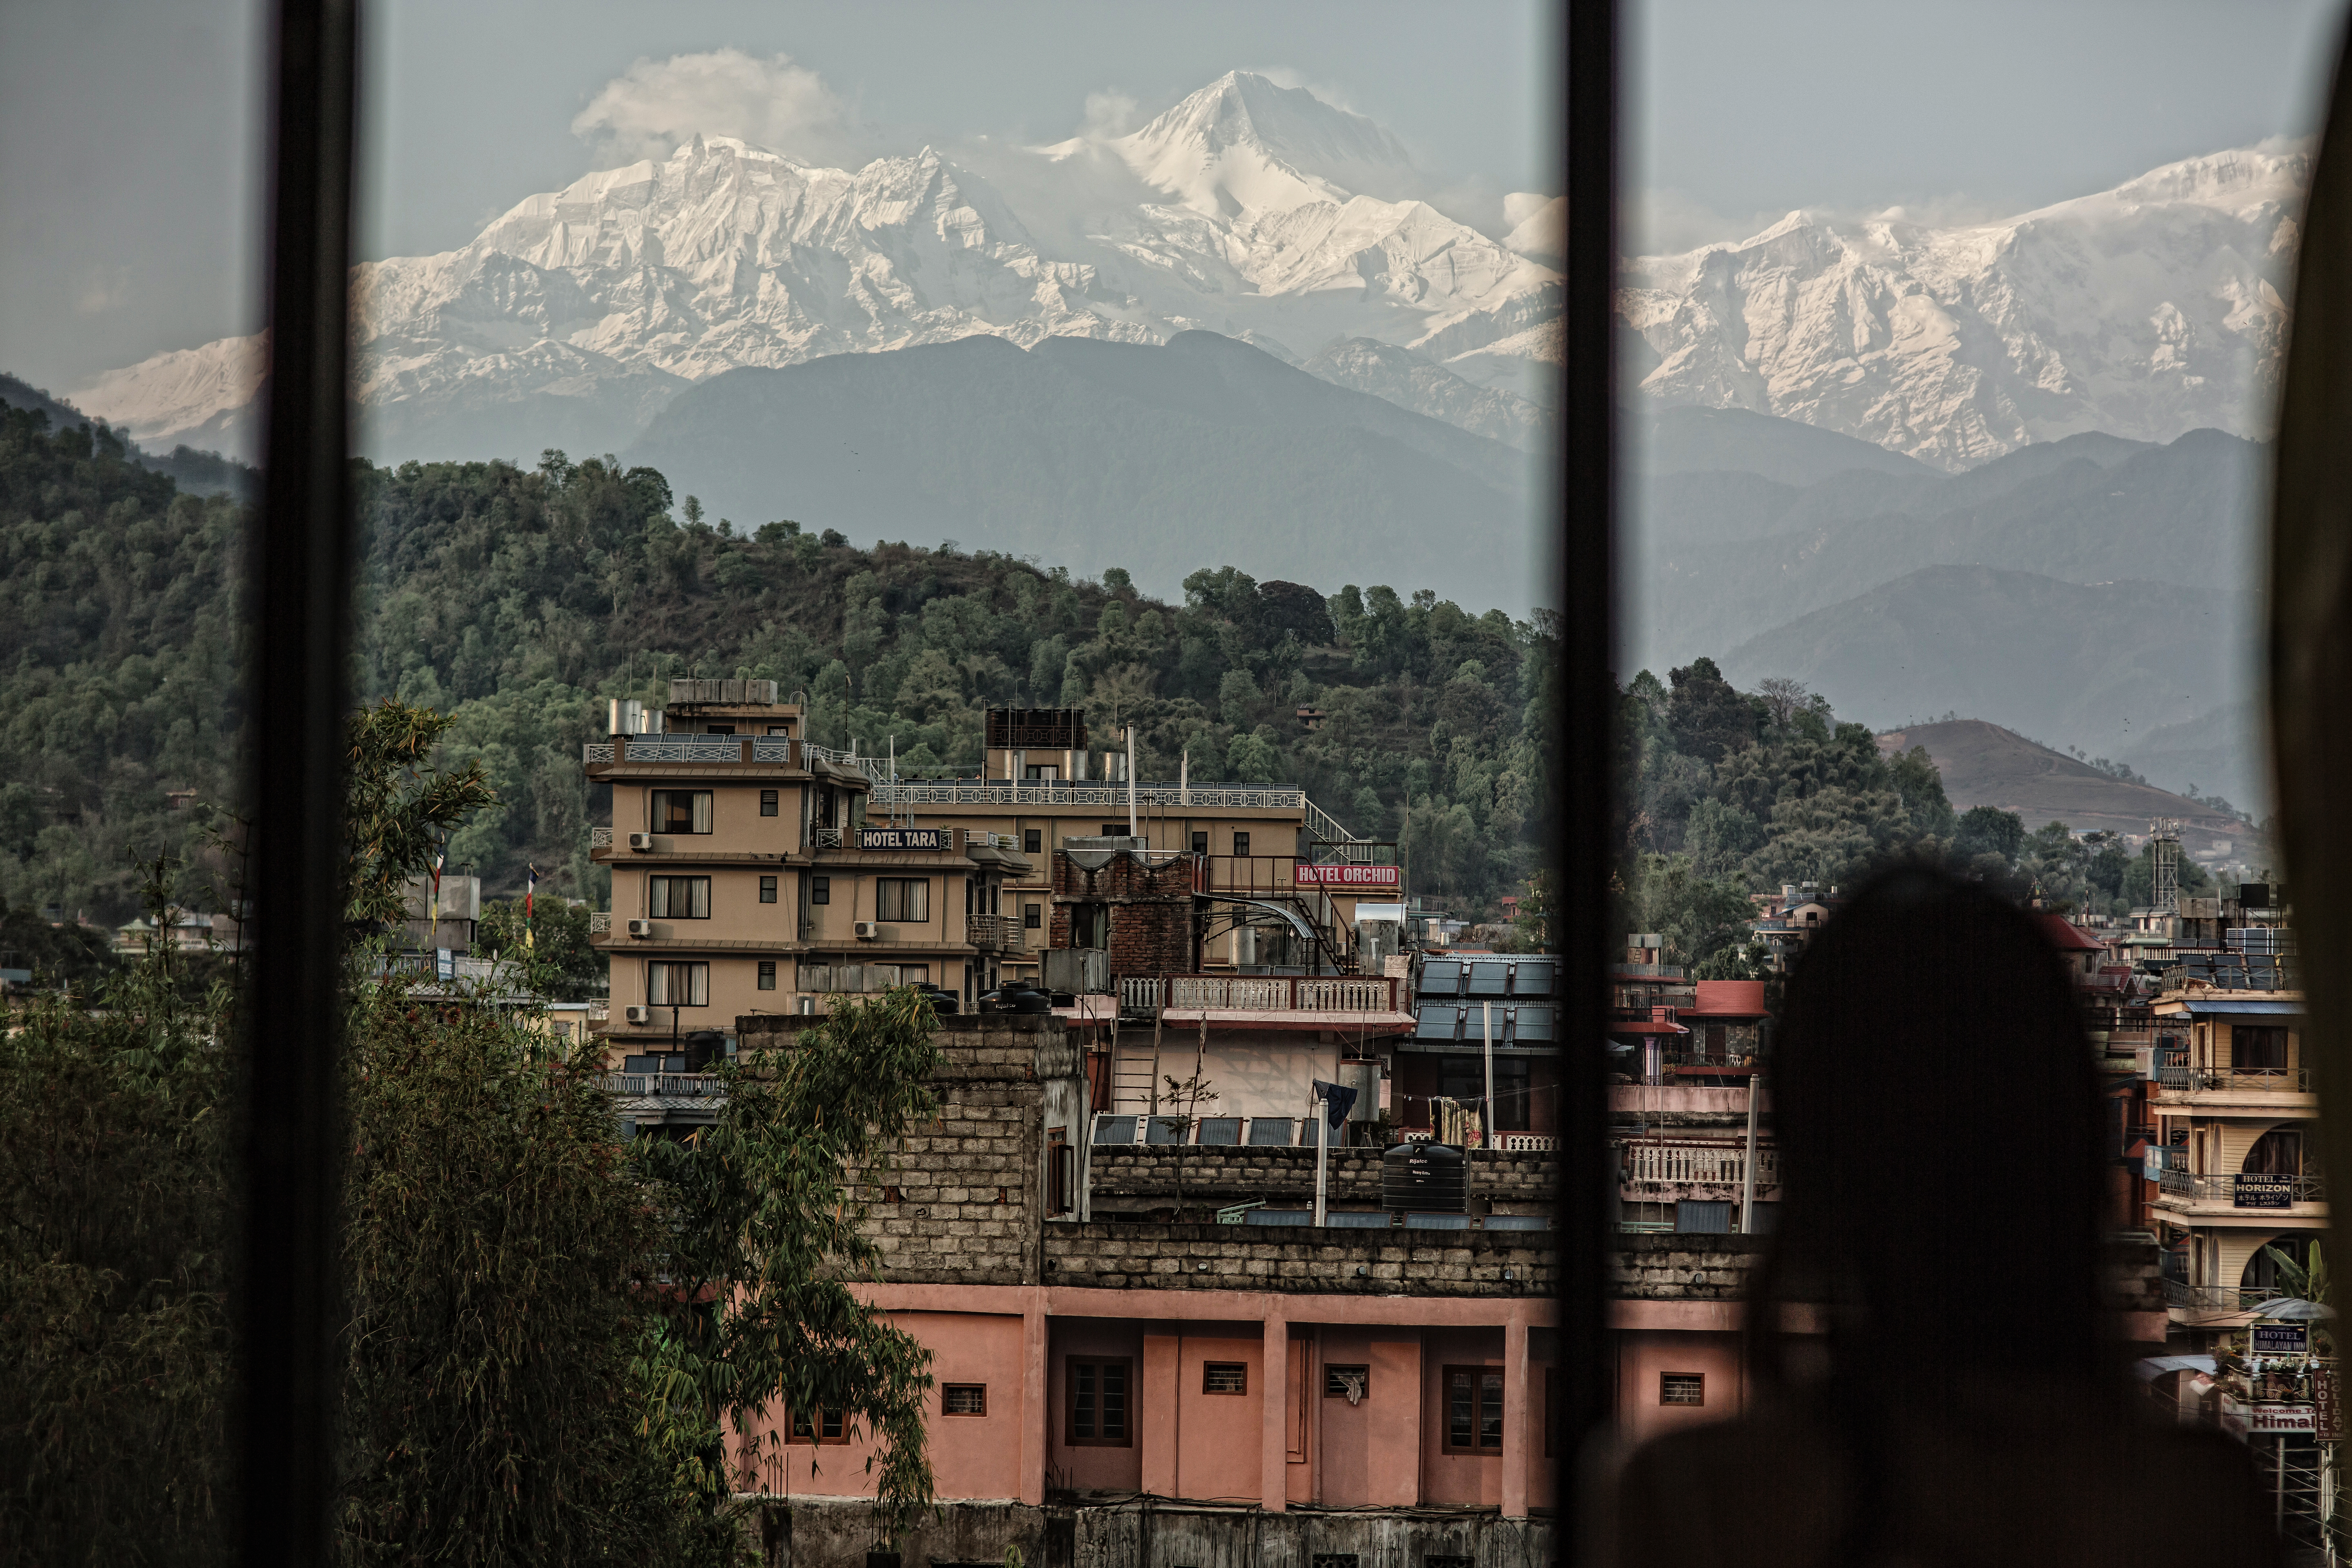
Stunning view of the Annapurna Range when the clouds lifted from our hotel room, with Diana in the foreground. We all rushed to take photos when it became visible.

NEPAL & INDIA trip-3250


The ubiquitous Taj Mahal + crowd shot:)

NEPAL & INDIA TRIP-3280


There is a certain beauty in the aesthetics of Amber Fort in Jaipur, the flowing walls and layout made for a less imposing structure than another photo below in another city.

NEPAL & INDIA TRIP-3332


Mehrengarh Fort in Jodhpur the blue city. Atop the hill overlooking the city, its imposing structure stands at a vast contrast to Amber Fort in Jaipur. It has never been conquered by any army.

INDIA & NEPAL Trip-3358


The view of Mehrengarh Fort from our haveli. You can see why this is referred to as the ‘blue city’.

NEPAL & INDIA Trip-3354


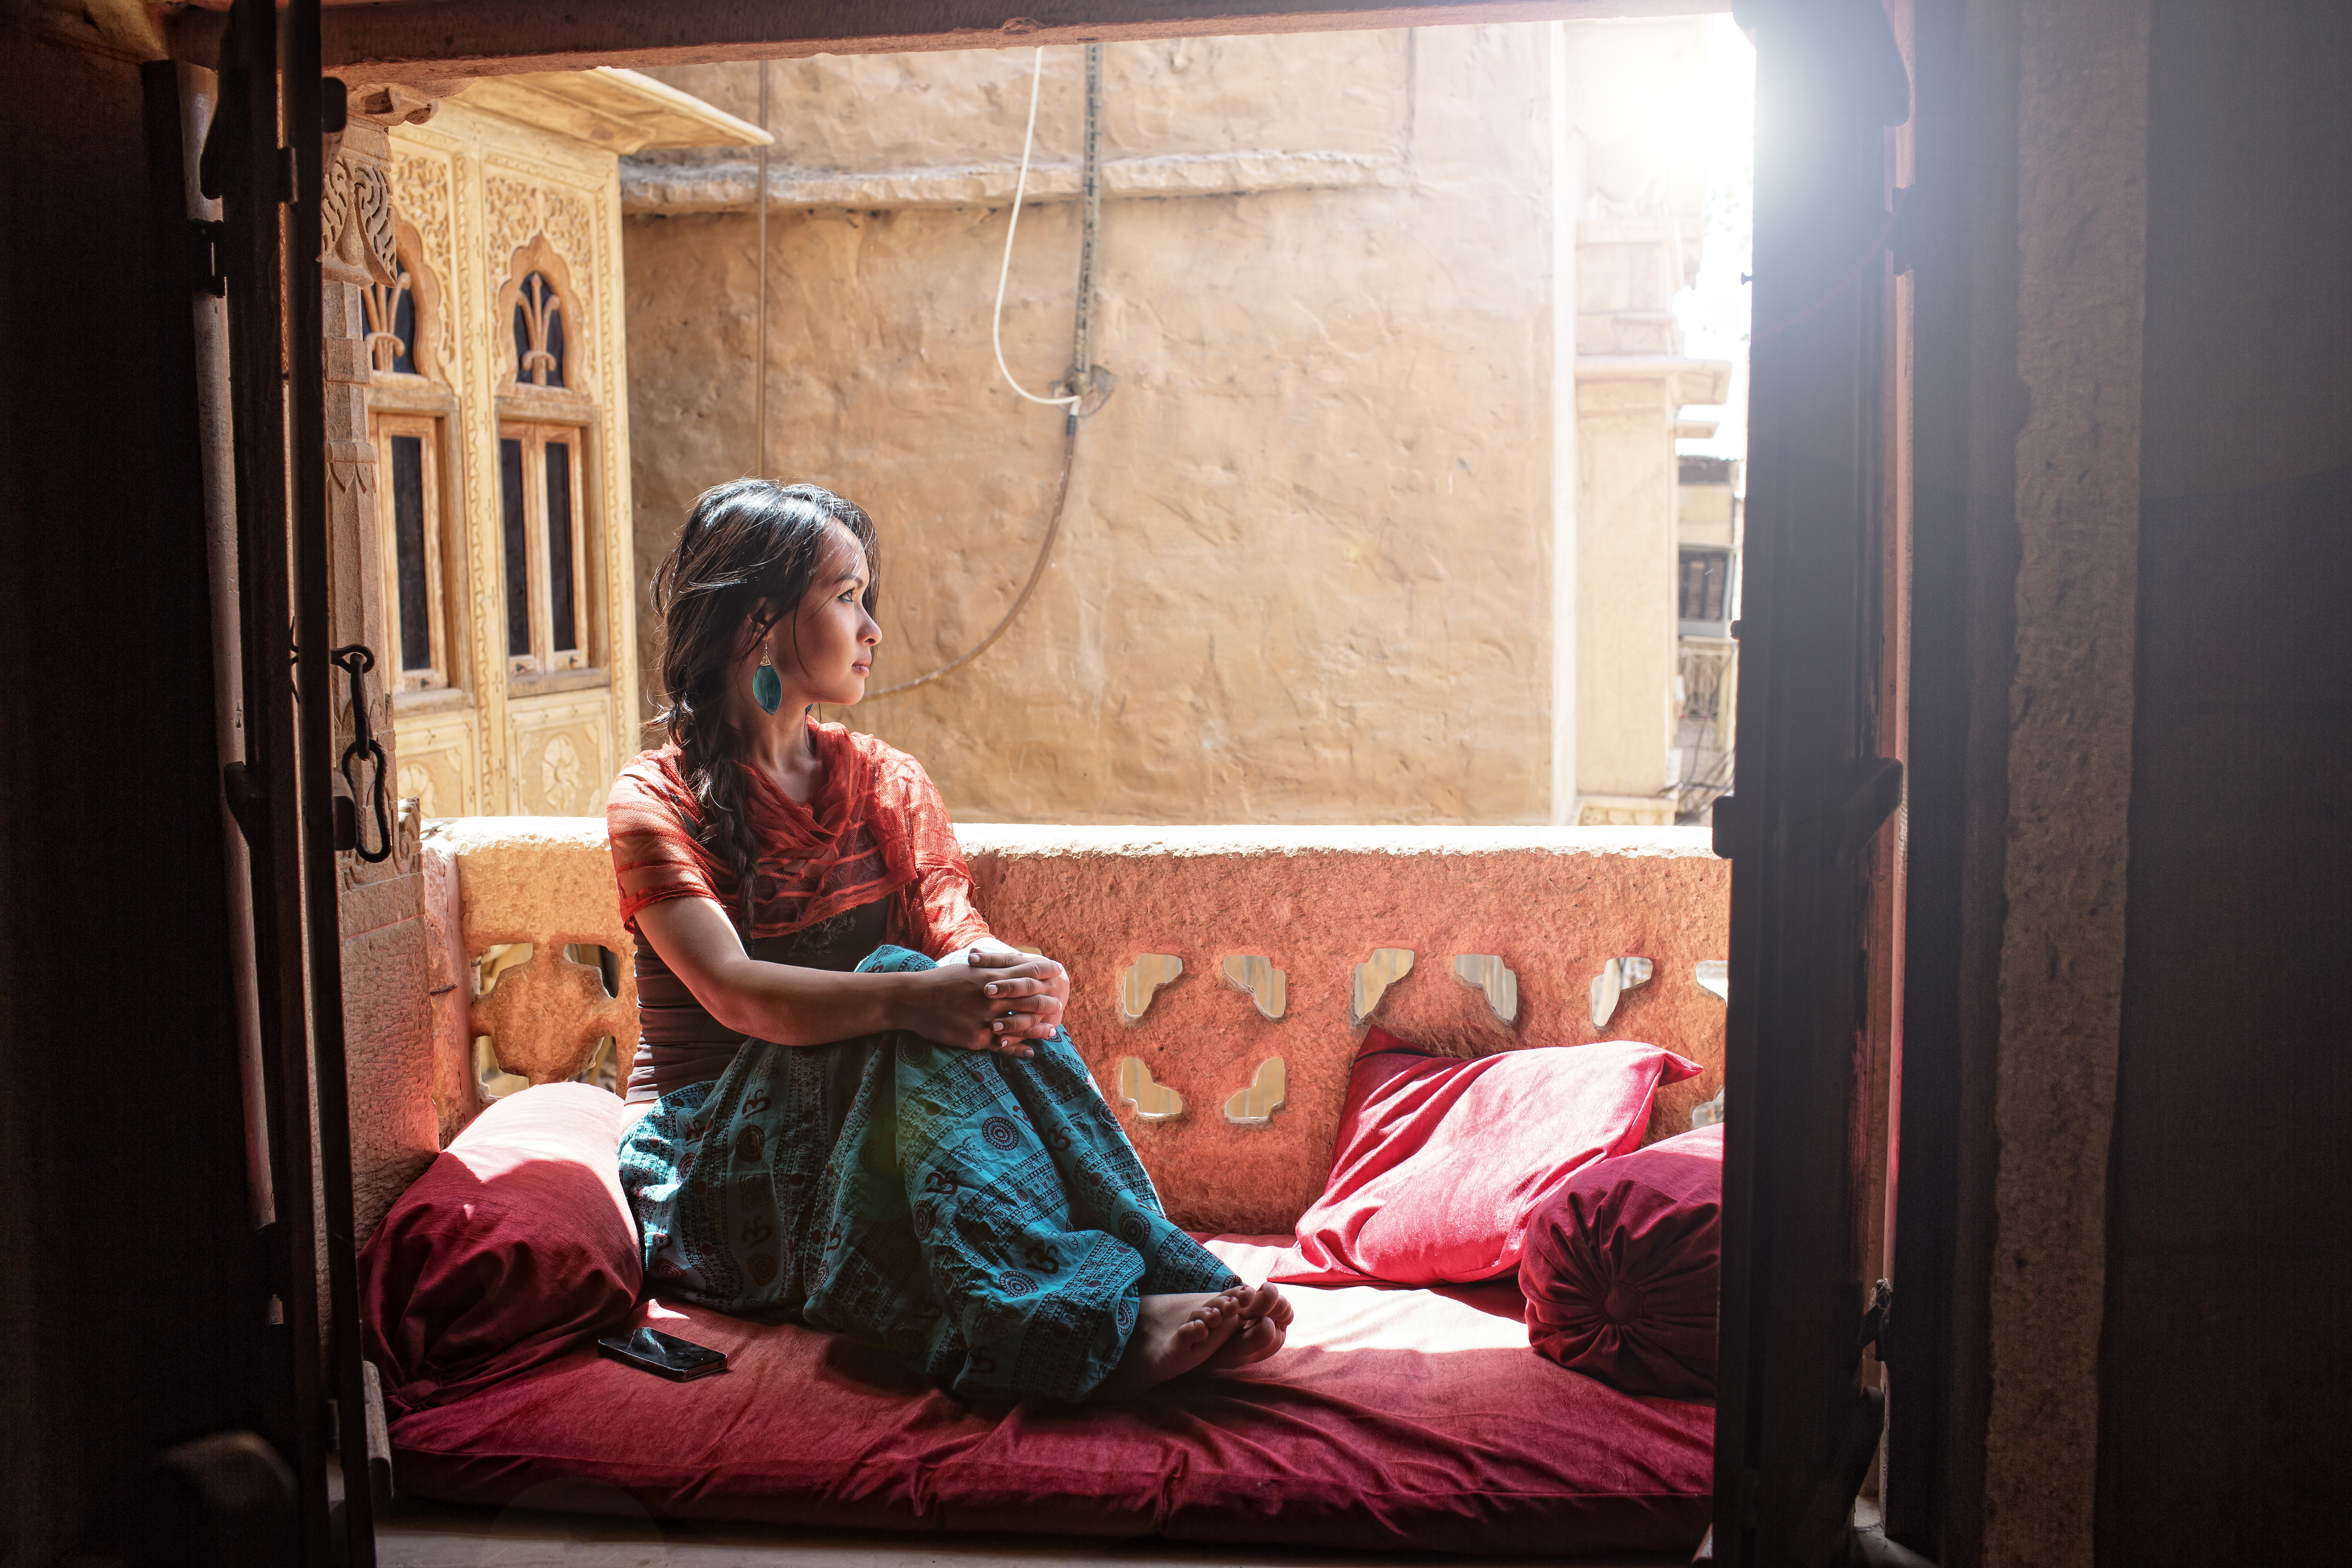
Another fort, this time in Jaisalmer in which we stayed inside and was a highlight in terms of exotic locale and customer service. The city of Jaisalmer resembled something from the Middle East in some parts, you wouldn’t think you are still in India.

NEPAL-INDIA TRIP-3419


The camel ride out into the Thar desert, an hour outside of Jaisalmer. It was a painful experience for the guys, for obvious reasons:)

NEPAL & INDIA TRIP-3563


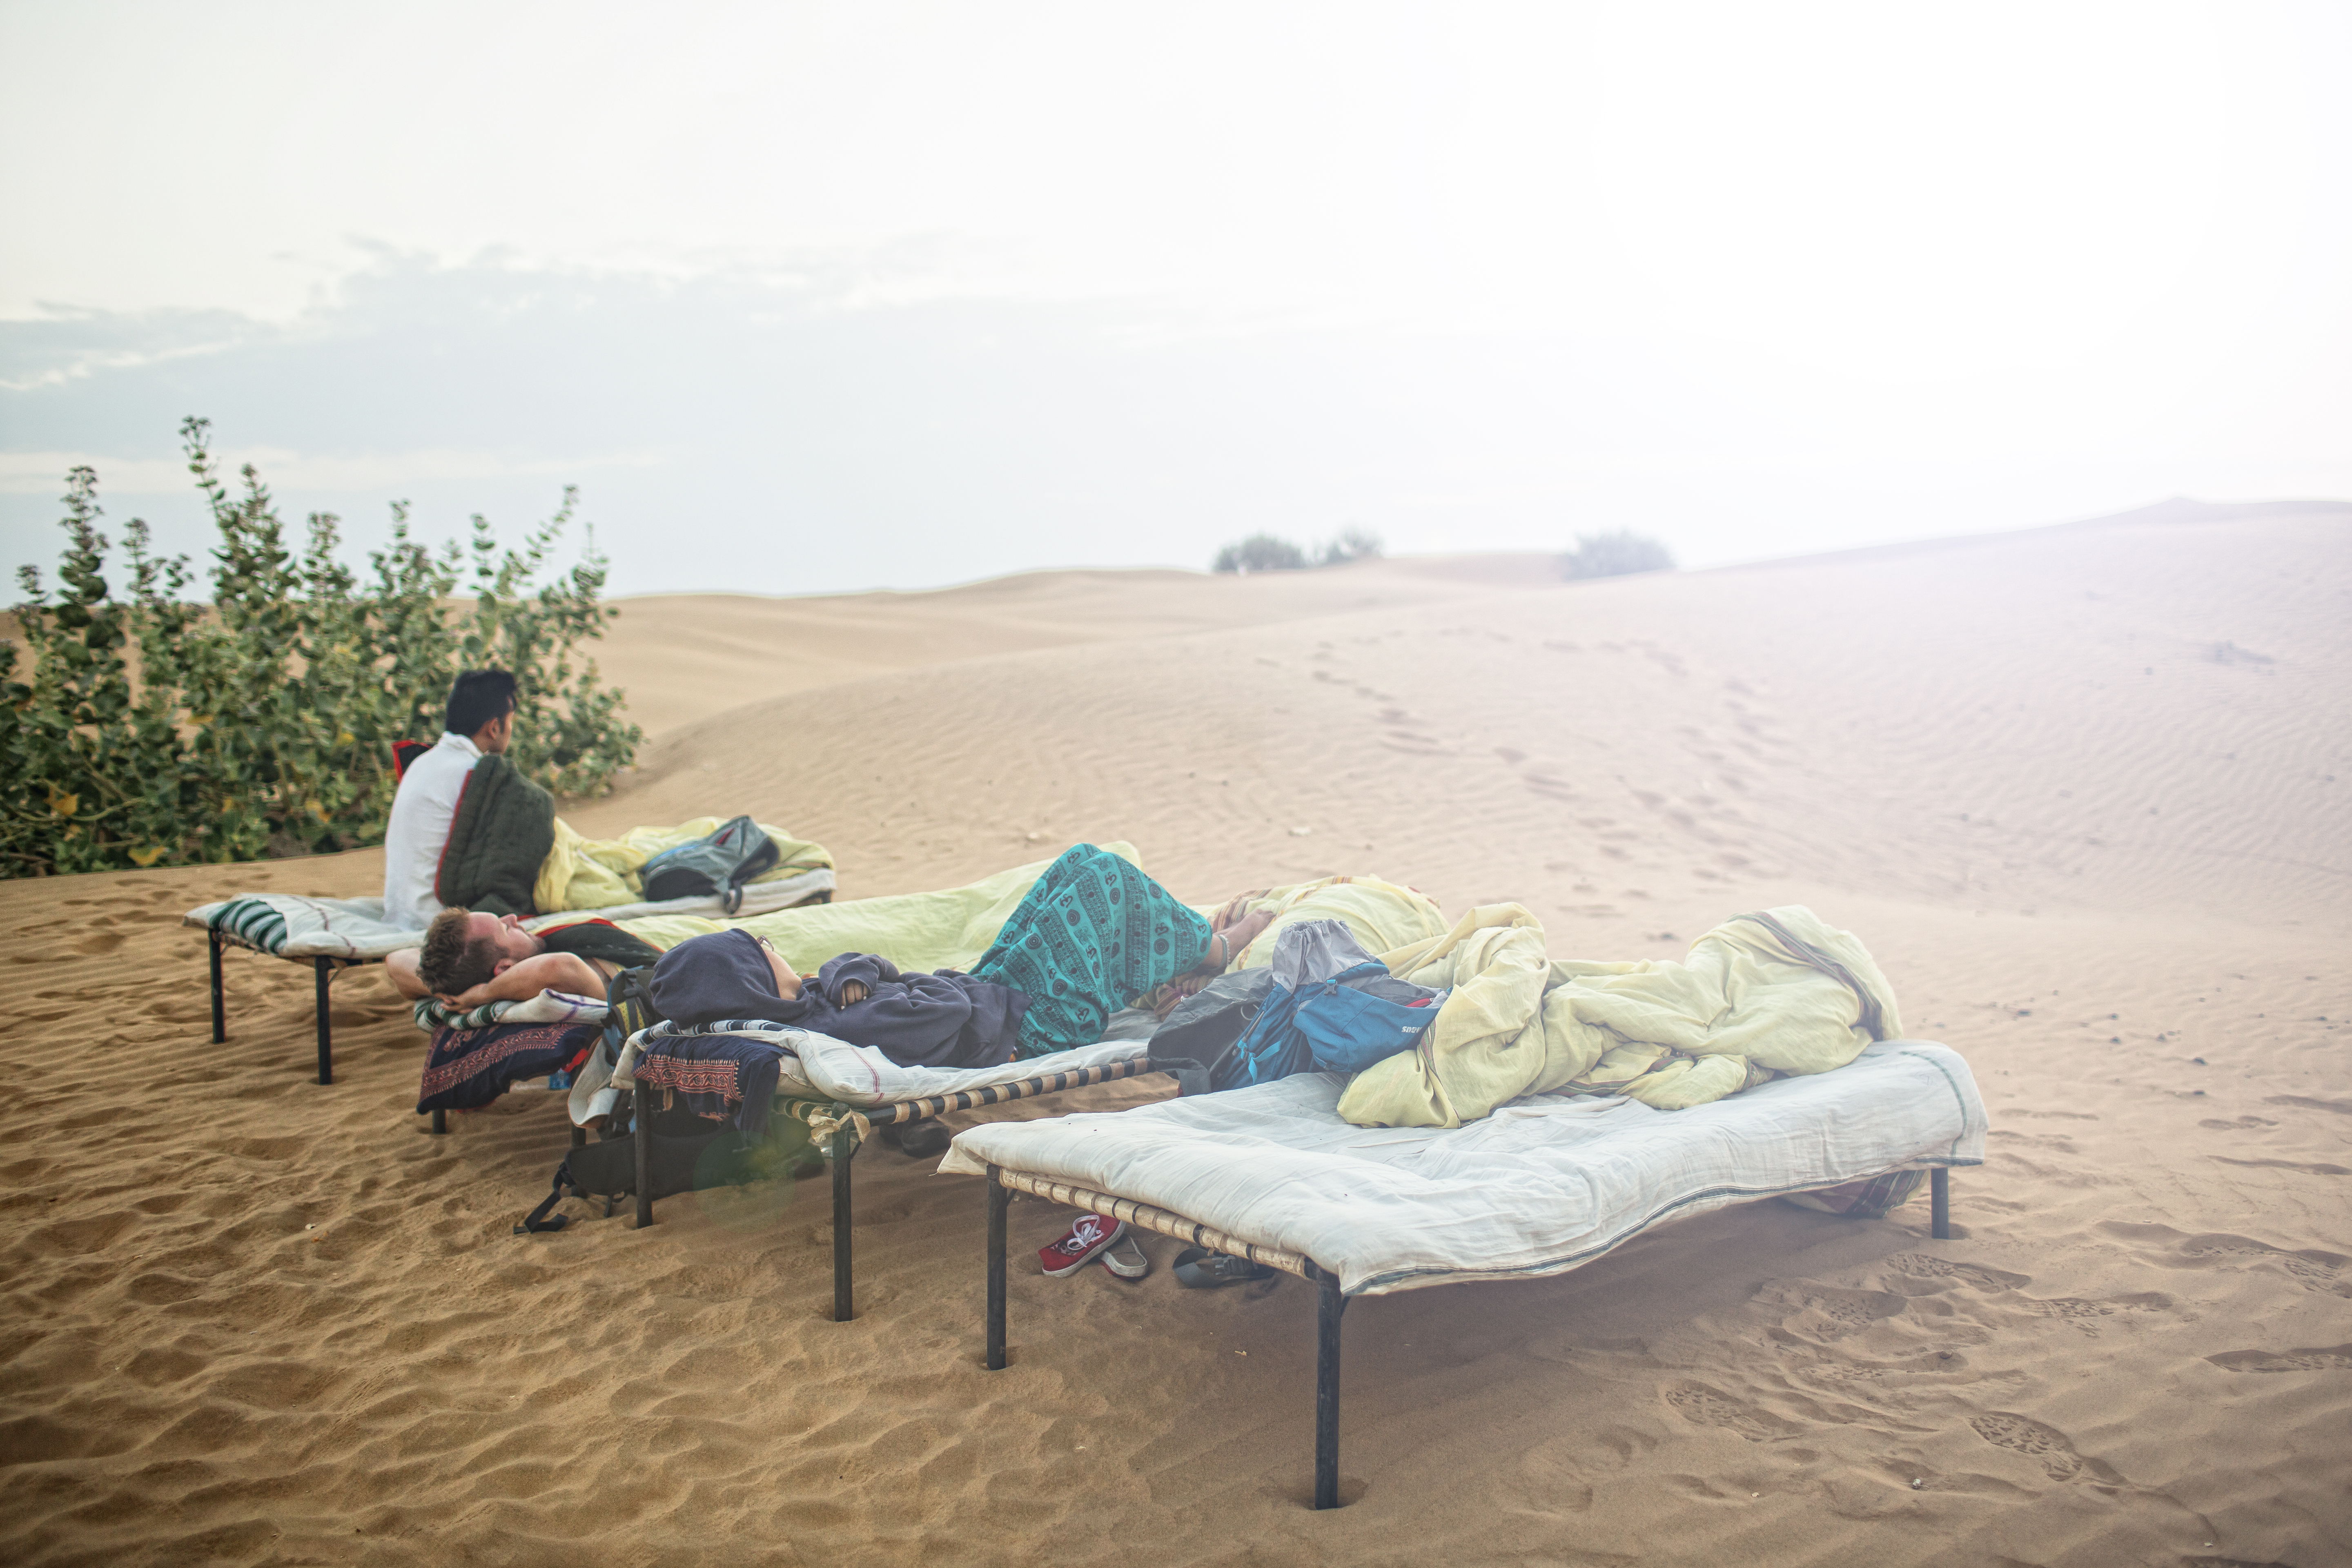
This was the moment we woke up in the early morning in the Thar desert.

NEPAL & INDIA Trip-3698


Inside our accommodation in Jaisalmer Fort. One word = colours!

INDIA & NEPAL Trip-3438


Categories: Uncategorized | Tags: , , , , , , , , , , , , , , , , , , | 1 Comment

iPhone Photography: Getting the best out of your camera

Spending up to five months away from home and overseas, lugging my full DSLR equipment everywhere I go just wasn’t gonna happen (even though I still try to, and rarely use it due to the size and bulk and lack of discretion). I had tried smaller solutions, such as the Canon S100 and Sony NEX5N – the latter I still use with an underwater housing for recreational scuba diving – they still represented another device one had to carry for the occasional snaps or postcard shots.

It was not until the end of 2012 that I switched over to the iPhone 5, and discovered the very fast camera it possesses – a much better improvement over the ‘shutter lag’ of the iPhone 4 and 4s. Being a professional photographer, I enjoy post processing/editing my photos and having the creative control over everything I shoot for that extra quality. I immediately jumped online and researched the inumerable apps available to the iPhone for editing/manipulation, and the rest was history.

I had found the solution I had been looking for. The iPhone 5 and 5s is more than capable of churning out 8×12 inch prints (A4 size) in good lighting, and smaller sizes easily – I dont think many people using the iPhone would be printing any larger anyway. If I were going to, I’d reach for my DSLRs or the NEX5N etc.

Below are the main apps I use for editing & manipulation in which I will show you the before and after effects in examples below.

EDITING

1) Snapseed – FREE – this app is great since becoming free to download on the app store, with a host of features and special effects – my favourite being the selective adjustment where you can brighten or darken selected parts of the image.

2) PhotoToaster – $2.99 – my third most used apps, for quick changes to Sepia, B&W and other effects fast.

3) Pro HDR – $1.99 – the first ever photo app I downloaded and my second most used – takes 1 underexposed and 1 overexposed photo to combine into a HDR style photo to show more details. This is great for highly exposed scenes where you want to retain details and vice versa. Only works well with non moving scenes however, otherwise there will be light trails or blur by movement.

4) Camera+ – $1.99 – my favourite and go-to app for majority of my photos because of one unique function – the Clarity function. One touch of it and it will brighten underexposed areas as well as increase sharpness and clarity to give your photos an instant pop. Although the app has many other features this is the one I use the most, and you can see the results below. The clarity function naturally results in more noise however, so be wary of using it with photos taken in low light or areas with lots of shadows.

MISCELLANEOUS

PhotoCollage – FREE – this is great for making photo collages, putting together 2 or 5 photos is only a touch away. Great for showing a place or scene in various angles in a collage instead of just a single photo.

InstaEffect – FREE – I rarely touch this app, but I’m sure there are many out there that would love the cool effects and colours it can throw over a photo. The only time I use this is for my Star Wars Re-Imagined by Lego series with my iPhone which is still being shot.

PhotoSync – $3.99 – absolutely invaluable to me and worth every cent! Fast selection of which photos from your camera to send wirelessly to your laptop or computer. I can usually send about 20 photos from my iPhone to my Macbook Pro in a few seconds flat. This is great if you want to do some further editing or retouching of the photos via Lightroom or CS which I do sometimes.

PHOTO EXAMPLES

Riding a scooter through rice fields and ponds near Hoi An, Vietnam. Taken with normal camera, then Clarity applied later to bring out more colours and contrast as it was a dull overcast dayIMG_0148

The world’s fastest production car – the Bugatti Veyron – parked everyday on Rodeo Drive, Los Angeles. I used the Clarity function of Camera+ to once again bring out the colours and details of the car.

IMG_0235

A small shrine in Shinjuku, Tokyo. I used Pro HDR to merge 2 photos together as the foreground tori gate was quite underexposed. After the photo has been taken, the app allows for further adjustments in exposure, saturation, warmth etc – very handy! On another note, if you have time – dont catch the train from Shinjuku to Shibuya – spend a few hours walking there instead, the quaint little stores and boutique shops make it a very enjoyable experience in which many tourists simply miss out on. It is under 5km in a straight line.

IMG_1206

I dont really know how to explain this photo, but how awesome is his little car! Saw this well dressed middle aged man driving this in Shinjuku, luckily he stopped at the traffic lights long enough to get a shot of him. Later on I applied Clarity to make it pop more.

IMG_1208

This was my return to Mount Fuji in Japan after nearly 7 years. I used Pro HDR to achieve the details in the foreground and background, then loaded it to my laptop via PhotoSync and then reduced some noise via Lightroom. I really like this as the mountain is well framed by the stack of rowing boats in the foreground.

IMG_1234

This is a life sized, 18m high original Gundam machine, outside of Diver City shopping complex on Odaiba Island, Tokyo – Japan. Not satisfied with the original shot, I used Clarity on it to give the machine more oomph. This is a side by side comparison of before and after Clarity. However the difference is more notice during daylight as there is more dynamic range for the program to work with. But you can see that below in other examples. IMG_1295

Toyota Mega Web museum on Odaiba in Japan is a must for any car enthusiast. In the historic side of the museum, there is a vintage set up complete with faux vintage surroundings and props and period items. Because I wanted to capture that vintage essence, I used Sepia via PhotoToaster, then Clarity via Camera+ to make it look more aged. IMG_1296

This is another angle of the above shot, but wider. I hate crooked shots, so I applied the same as above as well as the straighten too via Camera+ – the straighten tool is available in most photo apps and is an often overlooked function.

IMG_1299

At my resort in Cancun, Mexico. This gives you a better idea of how  Clarity works in daylight and the difference it makes with one simple touch. IMG_1300

On the rooftop of my hotel in Antigua, Guatemala facing one of the volcanoes overlooking the town. Here I used Clarity again, and it is able to brighten up previously darkened areas in the original photo.

IMG_1301

Thats the end of my beginner’s guide to iPhone photography and editing. My biggest word of advice is – BE CAUTIOUS. A new iPhone is rare in many countries and often seen as an object of status. Therefore muggings and robberies purely for iPhones whether you are on foot or on a vehicle is not unheard of. Be careful of where you pull your phone out to get that amazing shot.

Happy shooting!

Categories: Uncategorized | Tags: , , , , , , , , | 1 Comment

Blog at WordPress.com.